Blog

Adventure Meets Travel – Boy’s Room

3-discovery-adventure-toddler-bedroom-reverse-stencil-dresser-1-728x1024


I came across this room on Project Nursery – Project Junior.  This boy’s room vignette both captures my imagination and inspires me to get creative when painting furniture.  The biggest impact comes from the re-purposed dresser with the reverse pirate ship stencil.  What a concept!  I am sure the little boy who inhabits this room will grow up dreaming of adventure and travel.  Who wouldn’t with a collection of globes and a variety of model boats?  Topped off with a vintage skiing poster and accented with the perfect denim blue, this is a classic and sophisticated room that will easily transition from child to teen room.

This room was created by http://www.otherpiecesofme.com/

Contact Nesting Story for your child’s room design needs.

Beat Summer Boredom with Michaels Canada Room Decor Crafts for Kids


Summer break has begun!  Bike riding, swimming, lazing around… but after the initial excitement fades away and the “I’m bored” begins you will need to be ready with your arsenal of activities and crafts.  Being a crafty person myself I was very excited to welcome a Michaels to Milton, Ontario and thought I would have a peek inside to see what kind of summer craft ideas I could find.  What better way to give your kid’s rooms a face lift this summer than to involve them as well and make a summer project out of it!
IMG_4961

I found these simple frames on clearance ranging from $2.00 – $5.00.  What a steal!  Pick up a variety of sizes and styles, paint them different bright colours, bejewel them and add some photos of friends.  There you have it, a funky gallery wall.
IMG_4967

These solar system kits are not only fun to put together but educational as well.  Get some fishing wire while you are there and hang it as a mobile.  I am definitely picking one up for my son, the little scientist!
IMG_4970

Michaels carries a variety of model cars.  A fantastic summer project that will dress up your little man’s shelves.

IMG_4963IMG_4965

Grab some colourful baskets and synthetic flowers.  Hot glue the flowers to the baskets to create decor and storage for a girl’s room.

Feel free to contact Nesting Story for more design ideas or have us help you refresh your kid’s rooms.

Cozy Rainy Day Nursery

IMG_0932

It has been so rainy lately and the grey skies and sound of rain drops on my window make me want to curl up in a cozy bed.  I think Restoration Hardware’s new Boucle Cloud nursery bedding is so classic and cozy, a perfect combination for a nursery.  Adding a little colour and whimsy to this theme is the Little Red Umbrella Mobile from Little, a delightful Etsy shop specializing in hand made decor items for your little munchkin.

Etsy Shop Littles, Nursery Mobile, Little Red UmbrellaRH Baby Boucle Cloud Nursery Bedding Collection

Showcase – Cate and Levi Children’s Decor

Cate and Levi is a children’s decor, accessories, puppet and clothing company based out of Toronto, Canada.  Started by a father who wasn’t satisfied by the selection of adorable environmentally responsible yet affordable children’s products when expecting his first child.  Cate and Levi’s products are handmade and use reclaimed materials such as wool whenever possible.  I cannot wait to add these crafty touches to a nursery.  Simply adorable!

lifestyle_wall_pockets


Woolly Wall Pocket

moose_plaque-200x200 lionhead_plaque-200x200 elephant_plaque-200x200

Animal Plaques

A Mural Comes to Life!

Nesting Story began with my children’s murals and bloomed from there.  I love meeting with a new client and hearing their exciting ideas and plans for their child’s room.  Sometimes the child is older and has a lot of great ideas to add, other times the little one hasn’t arrived yet and I am meeting with very excited parents-to-be.  Whatever the case may be and whoever my little client is, there is a lot of thought and love that goes into each mural I paint.  I wanted to show how the process works and maybe inspire you along the way!

Step 1: The Initial Consultation

I like to meet with potential clients in person whenever possible.  It gives me a better feel as to what they have been thinking about and it is very helpful to see the space.  Any kind of inspirational images that can be brought to this meeting is also very helpful.  From this point I can create the concept sketch.

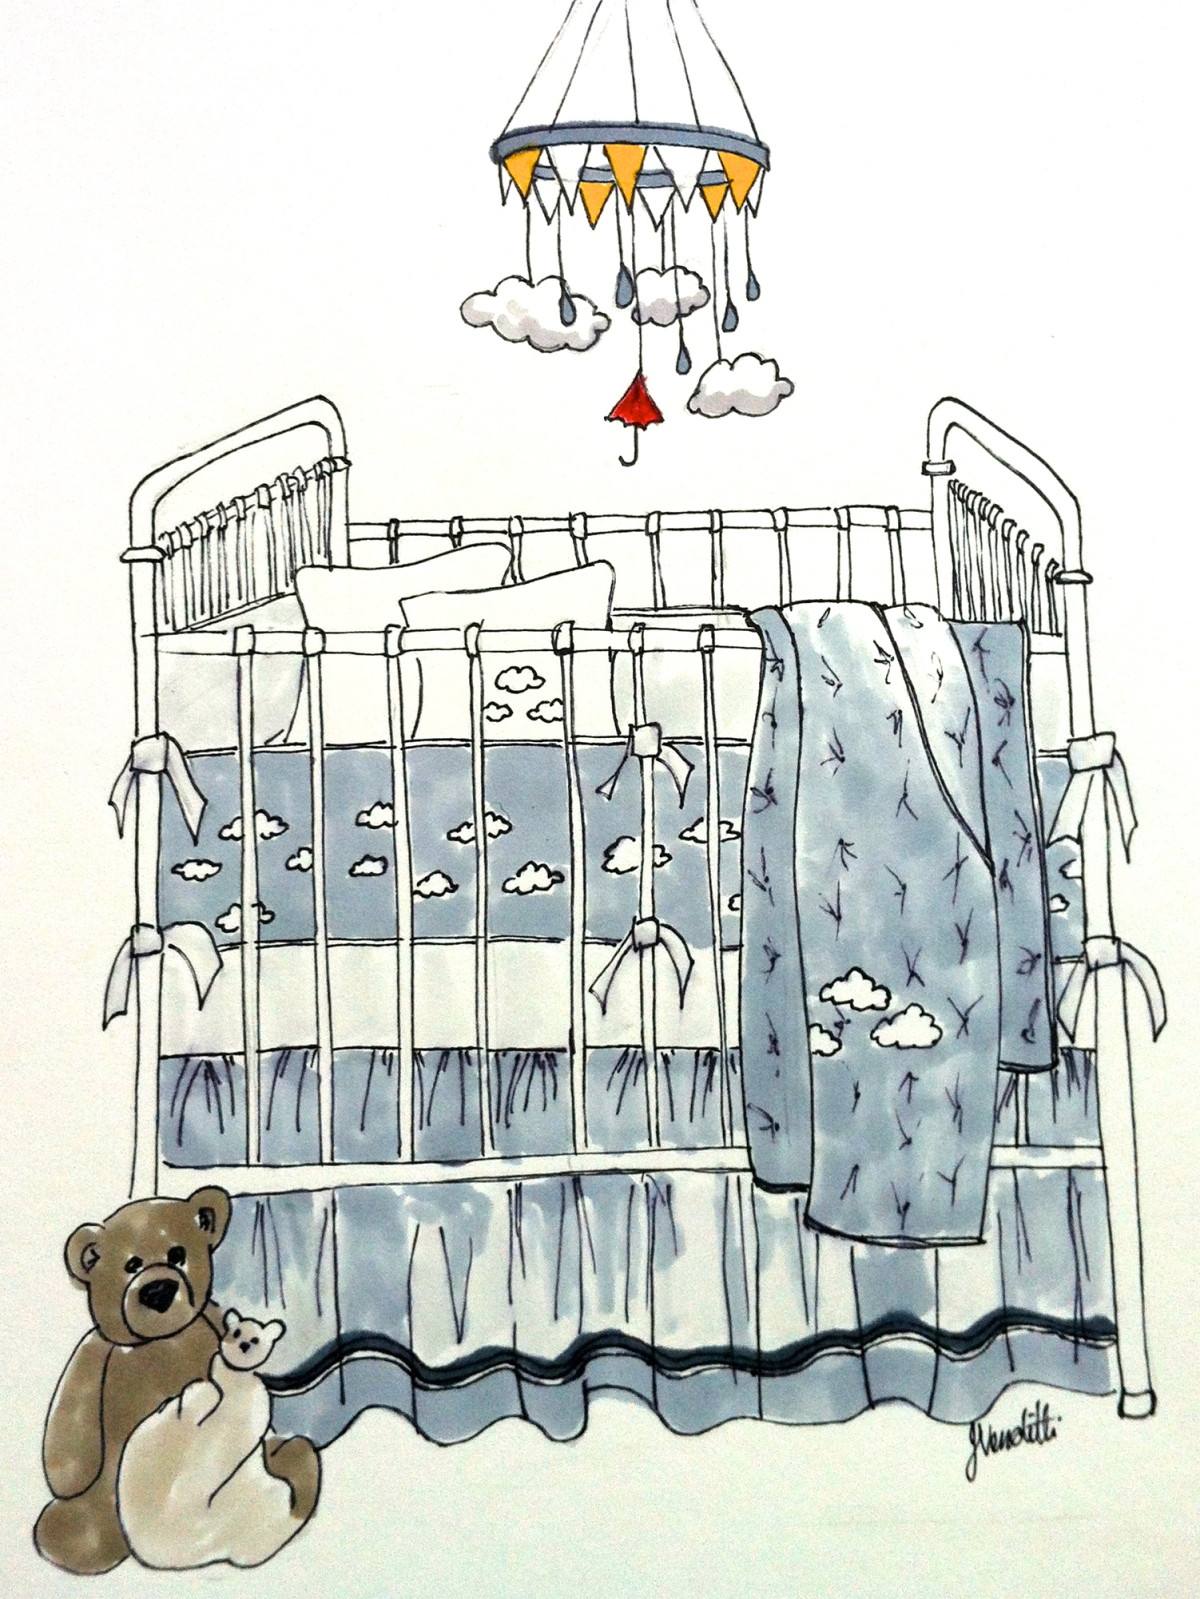
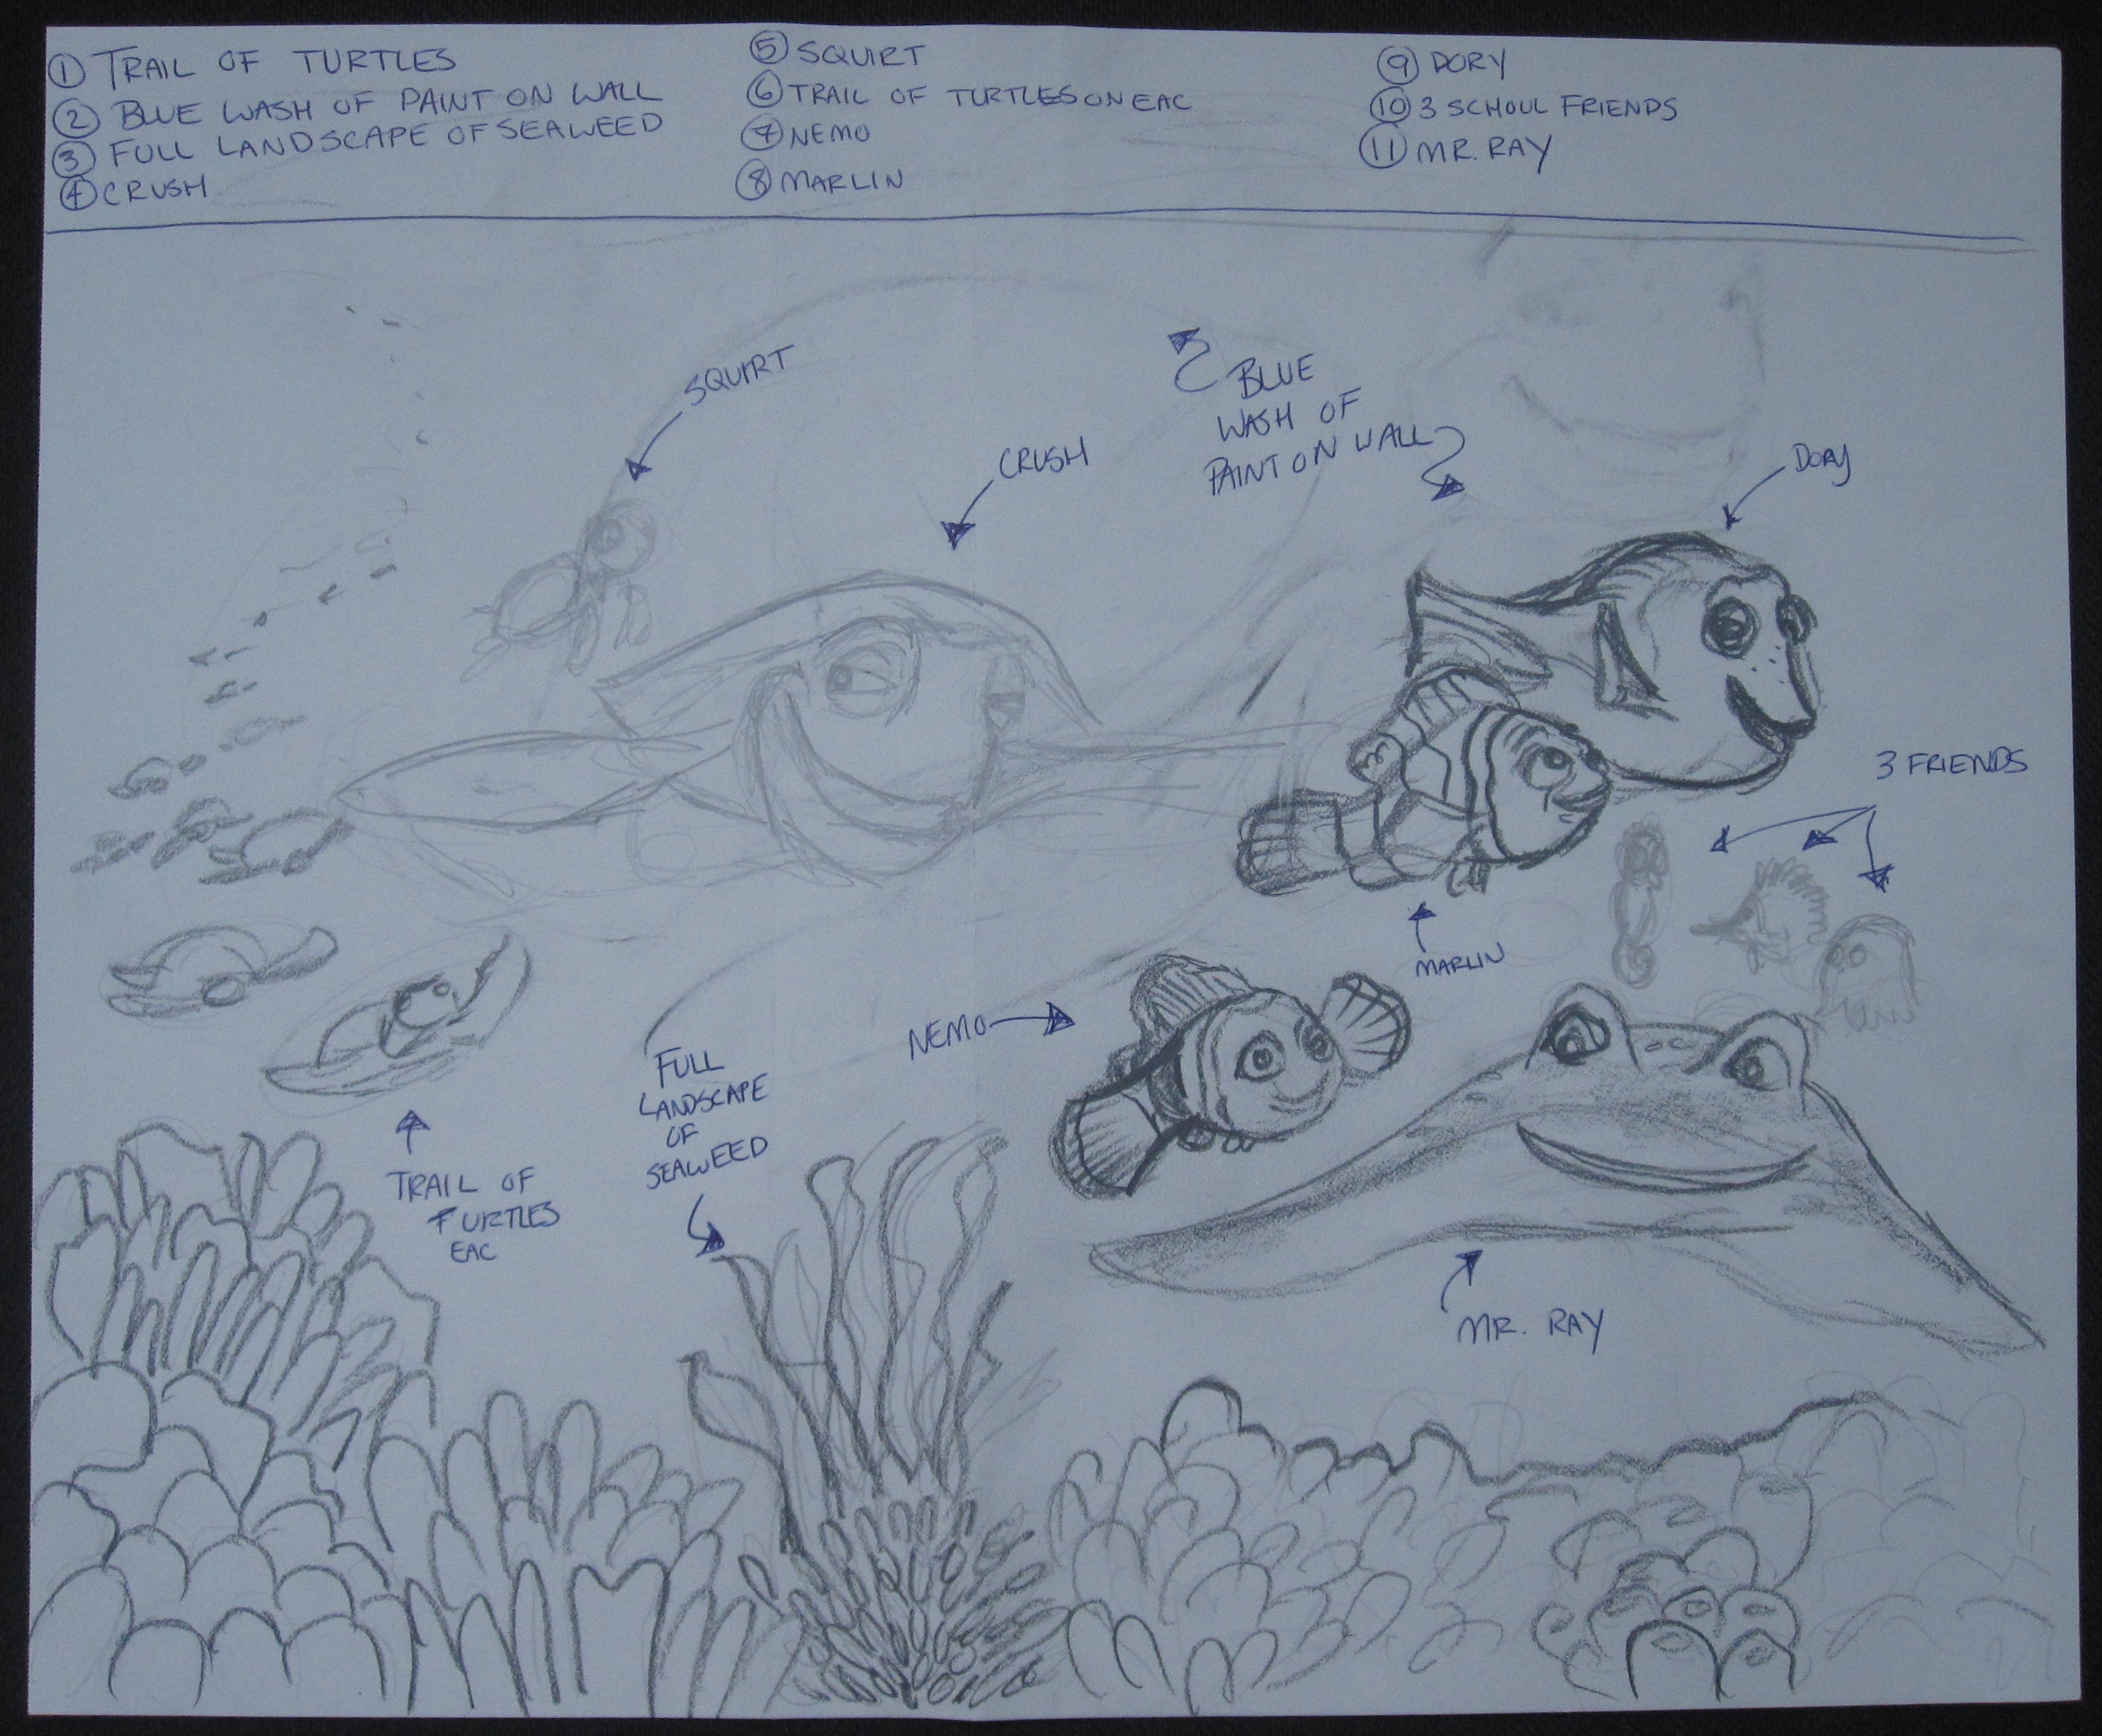
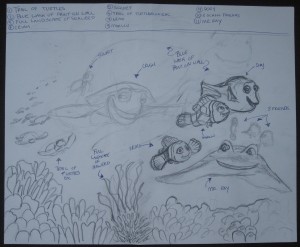
Step 2: The Concept Sketch

I take all of the elements and ideas that are going into the mural and create a concept sketch.  Each Item is named and numbered.

IMG_3915


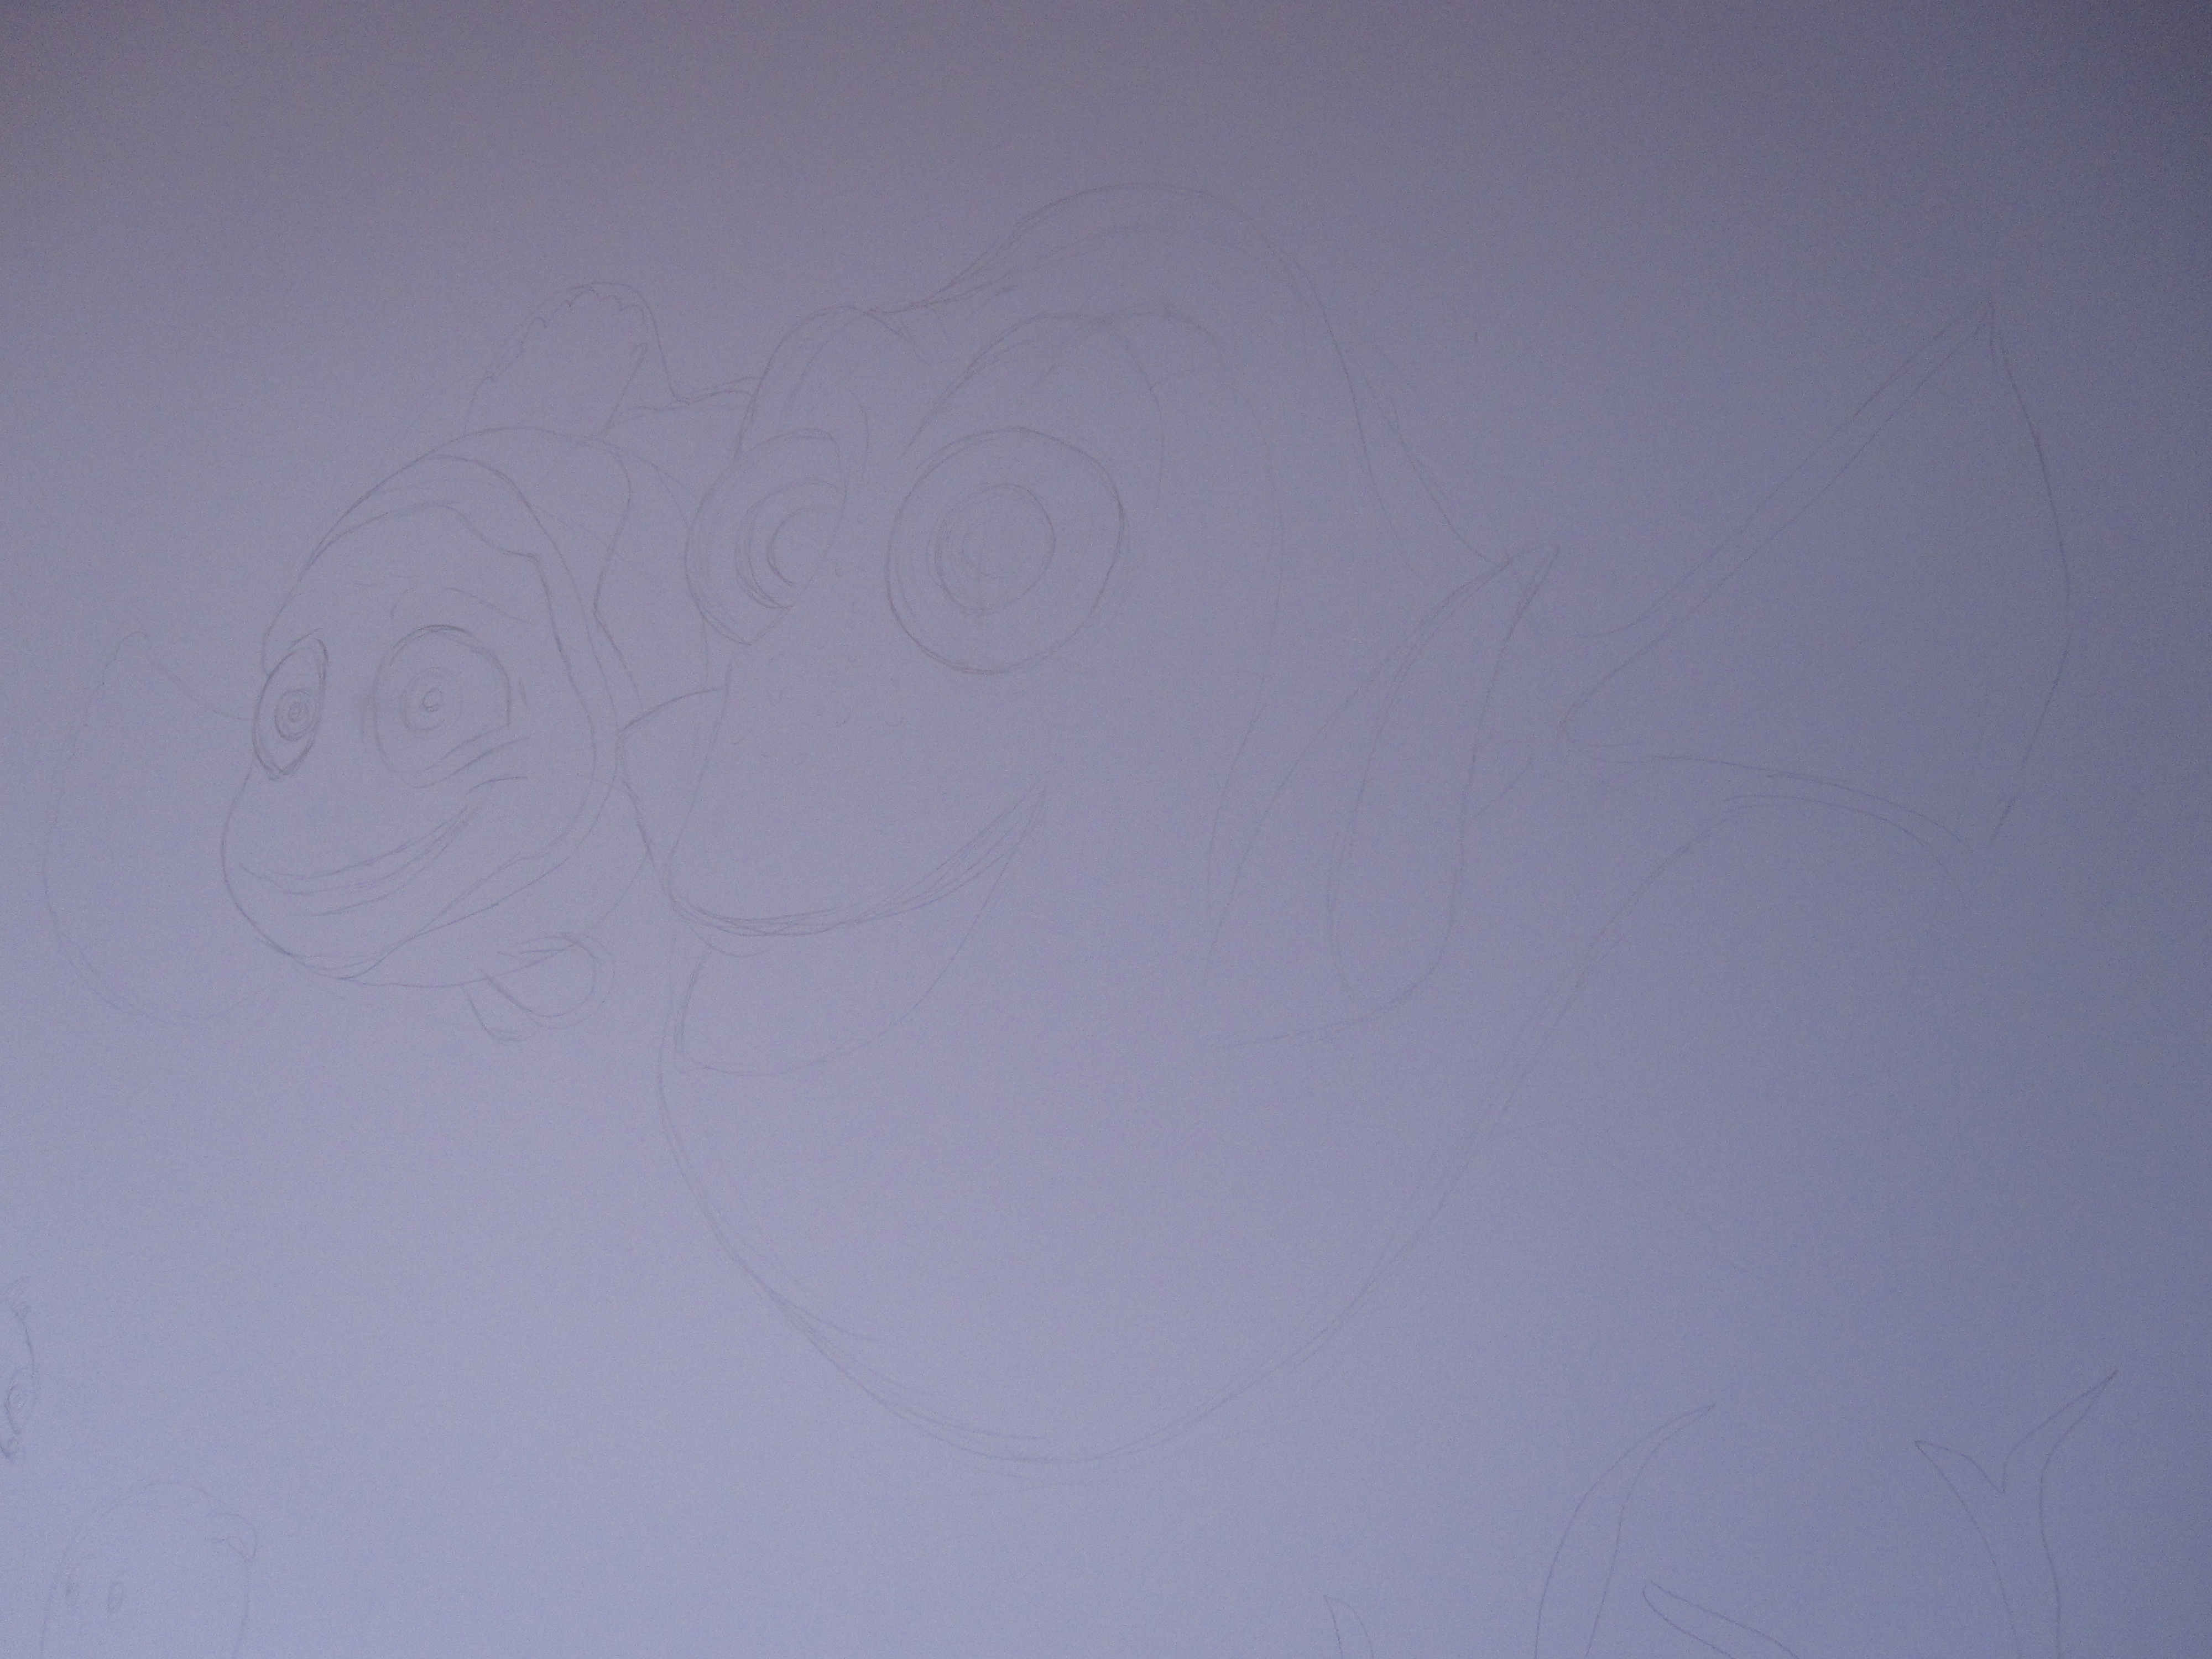
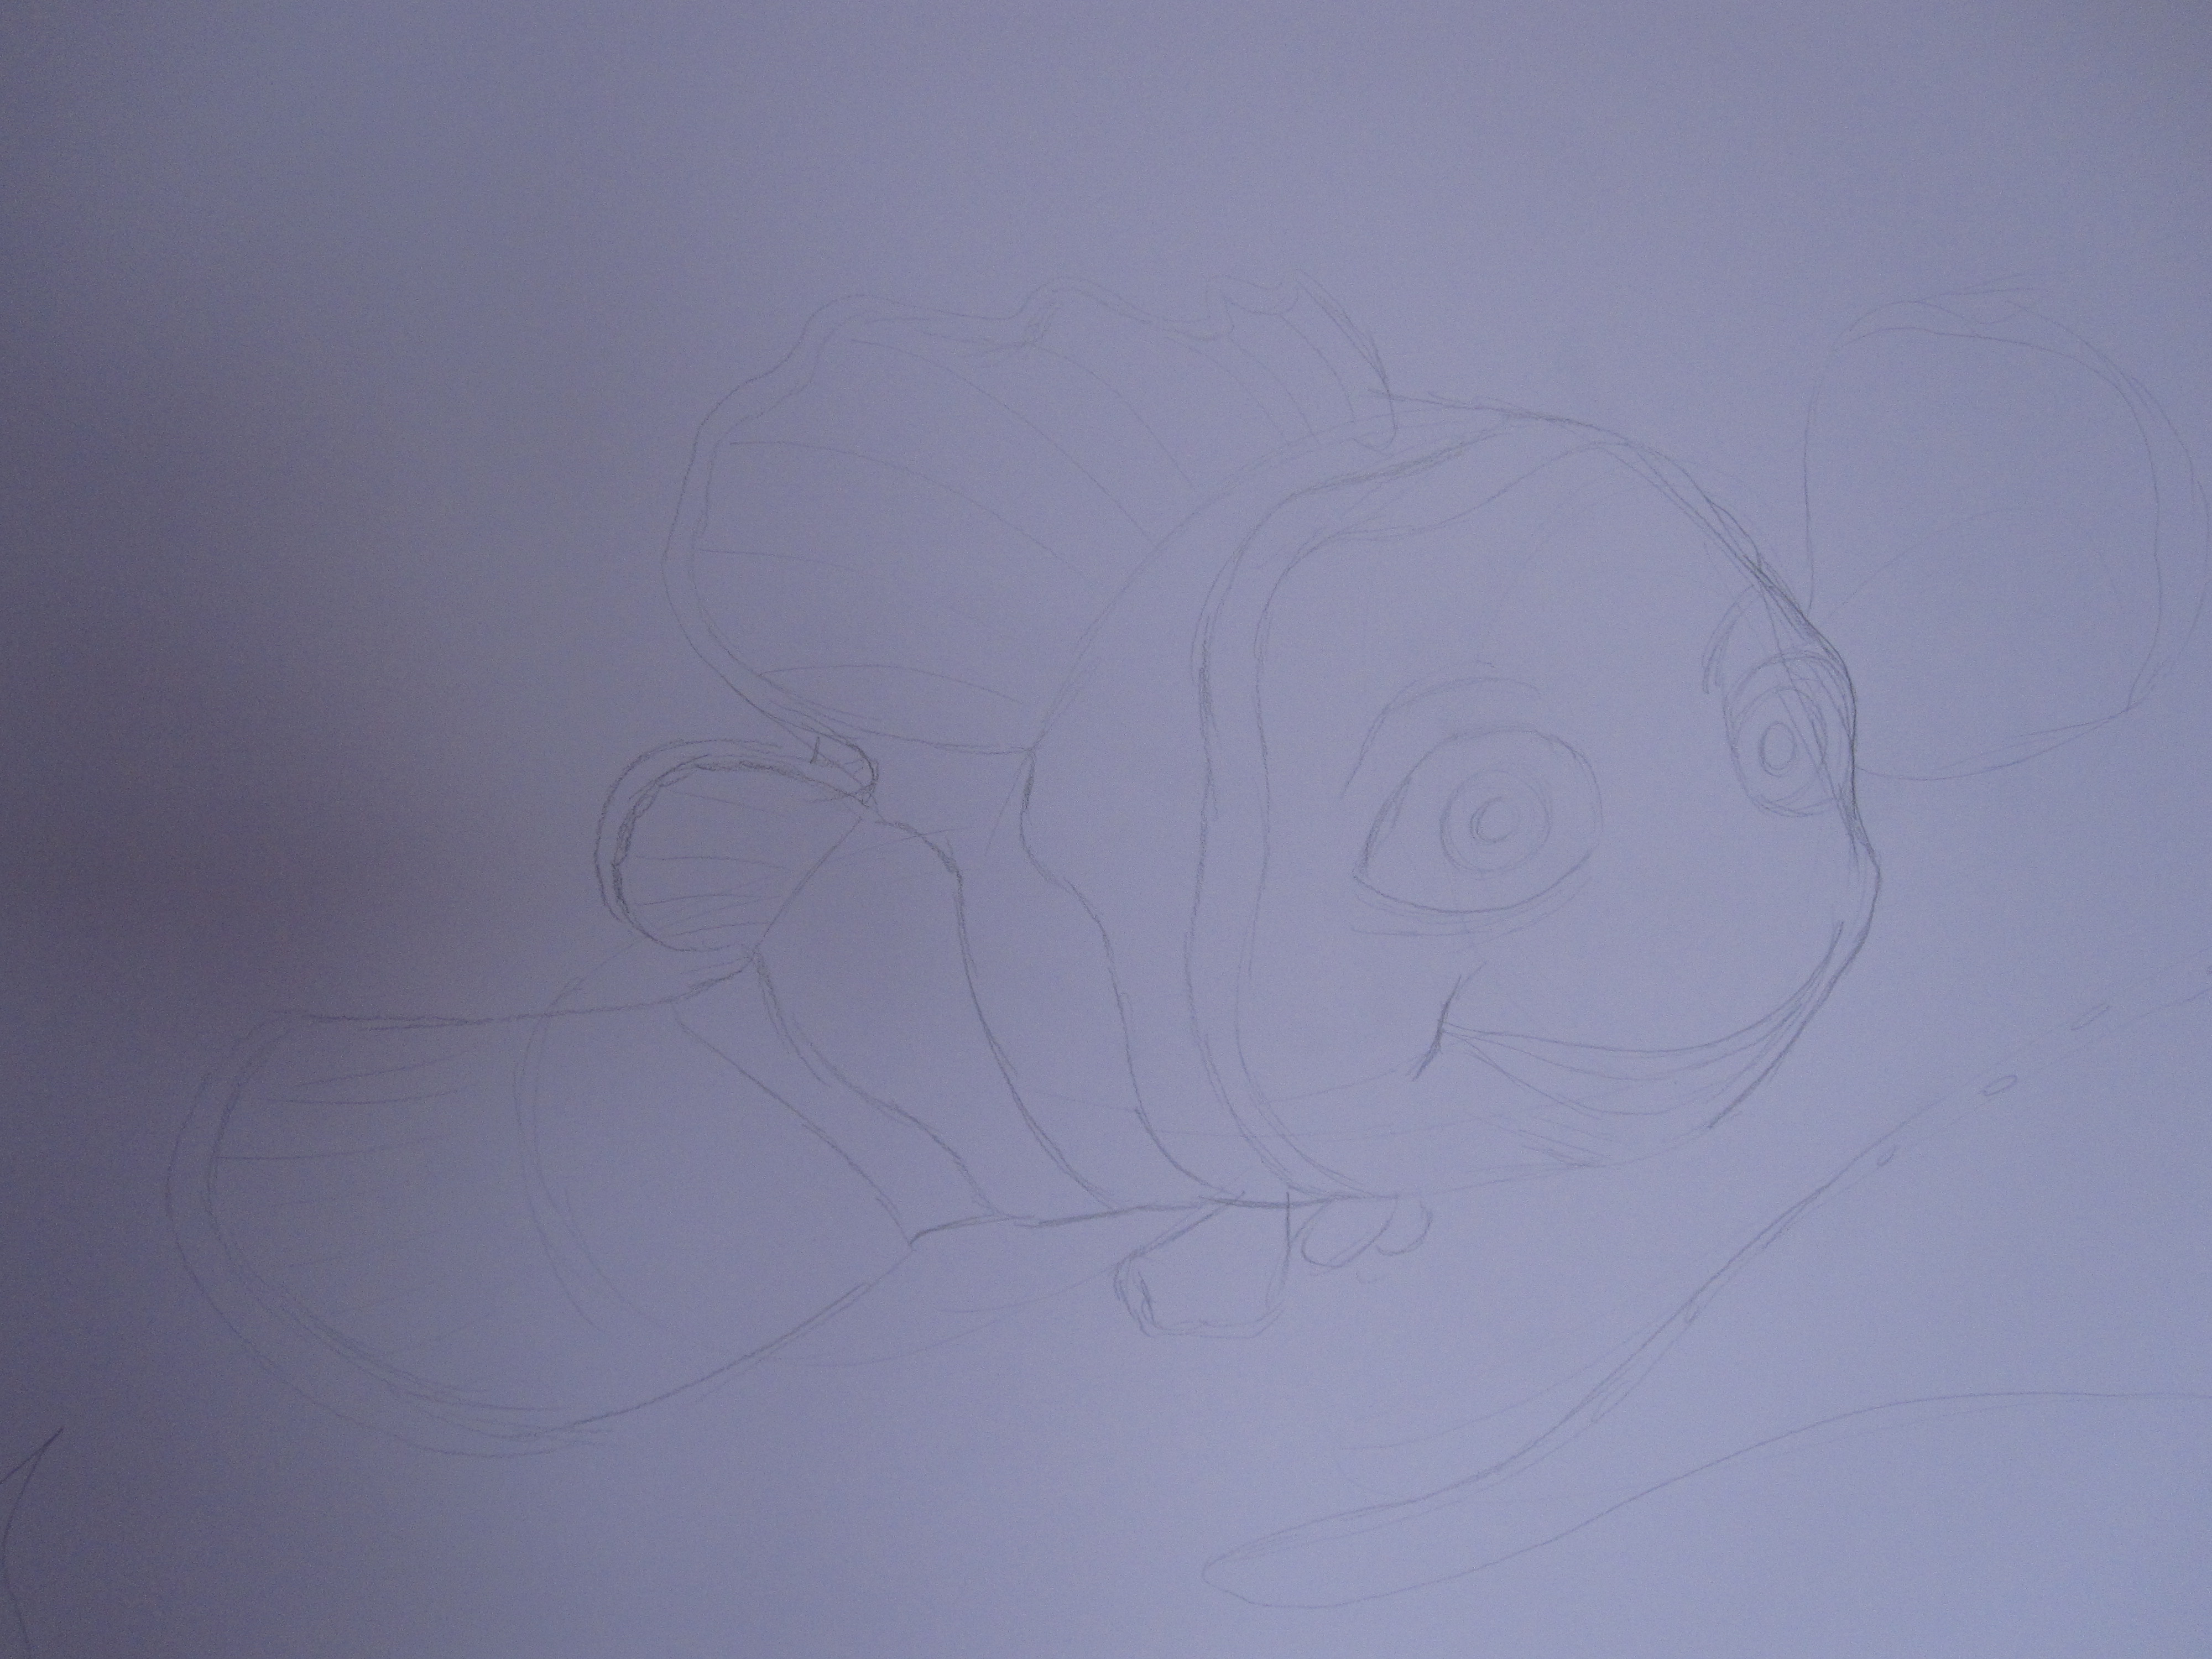
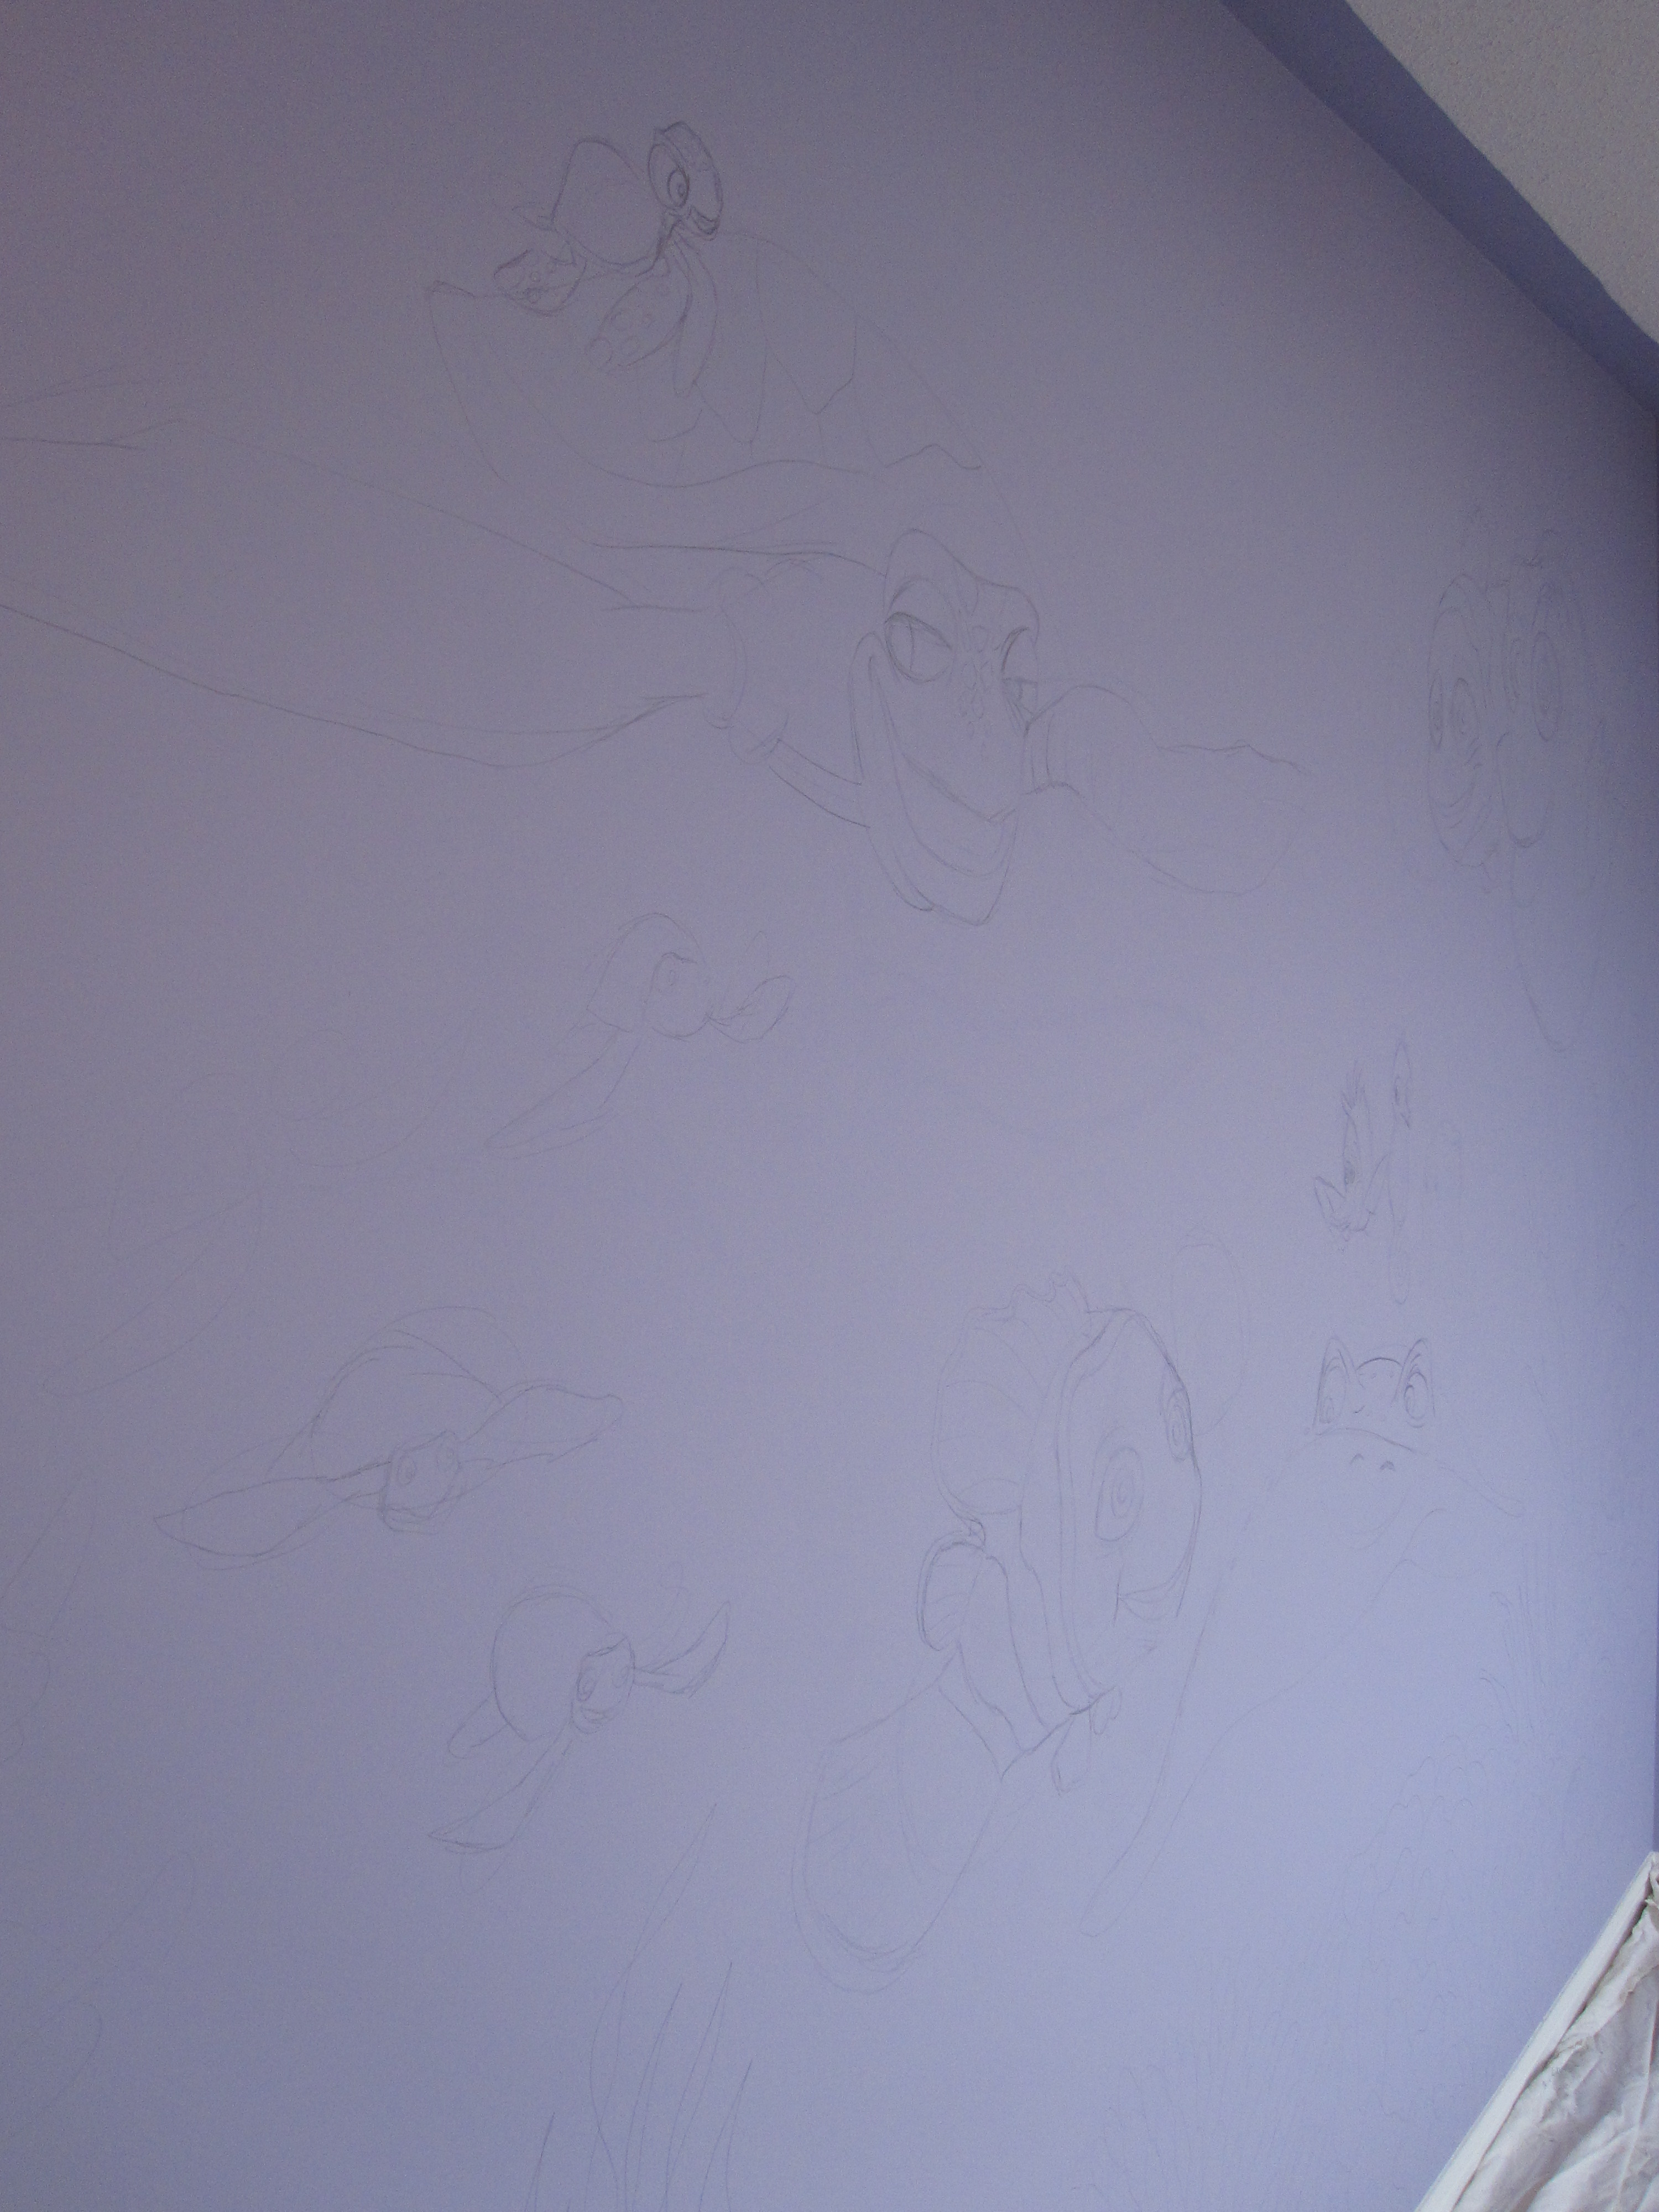
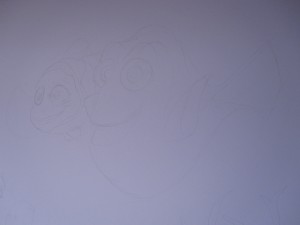
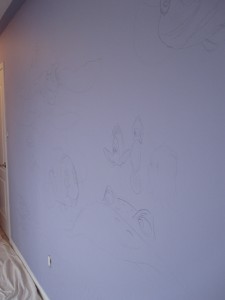
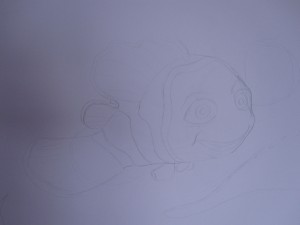
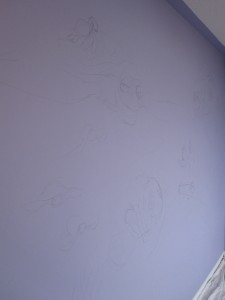
Step 3: Sketch and Layout on Walls

Once the concept sketch has been approved it is time to start.  Most of the time the walls need to be painted a base colour.  This needs to be done before the mural can start.  I would be happy to recommend a painter for this process.  Using small inspirational images and the concept sketch I then freehand draw the mural on to the wall.  Once the sketch on the wall has been approved it is time to start painting.

IMG_3840    IMG_3841  IMG_3843     IMG_3844


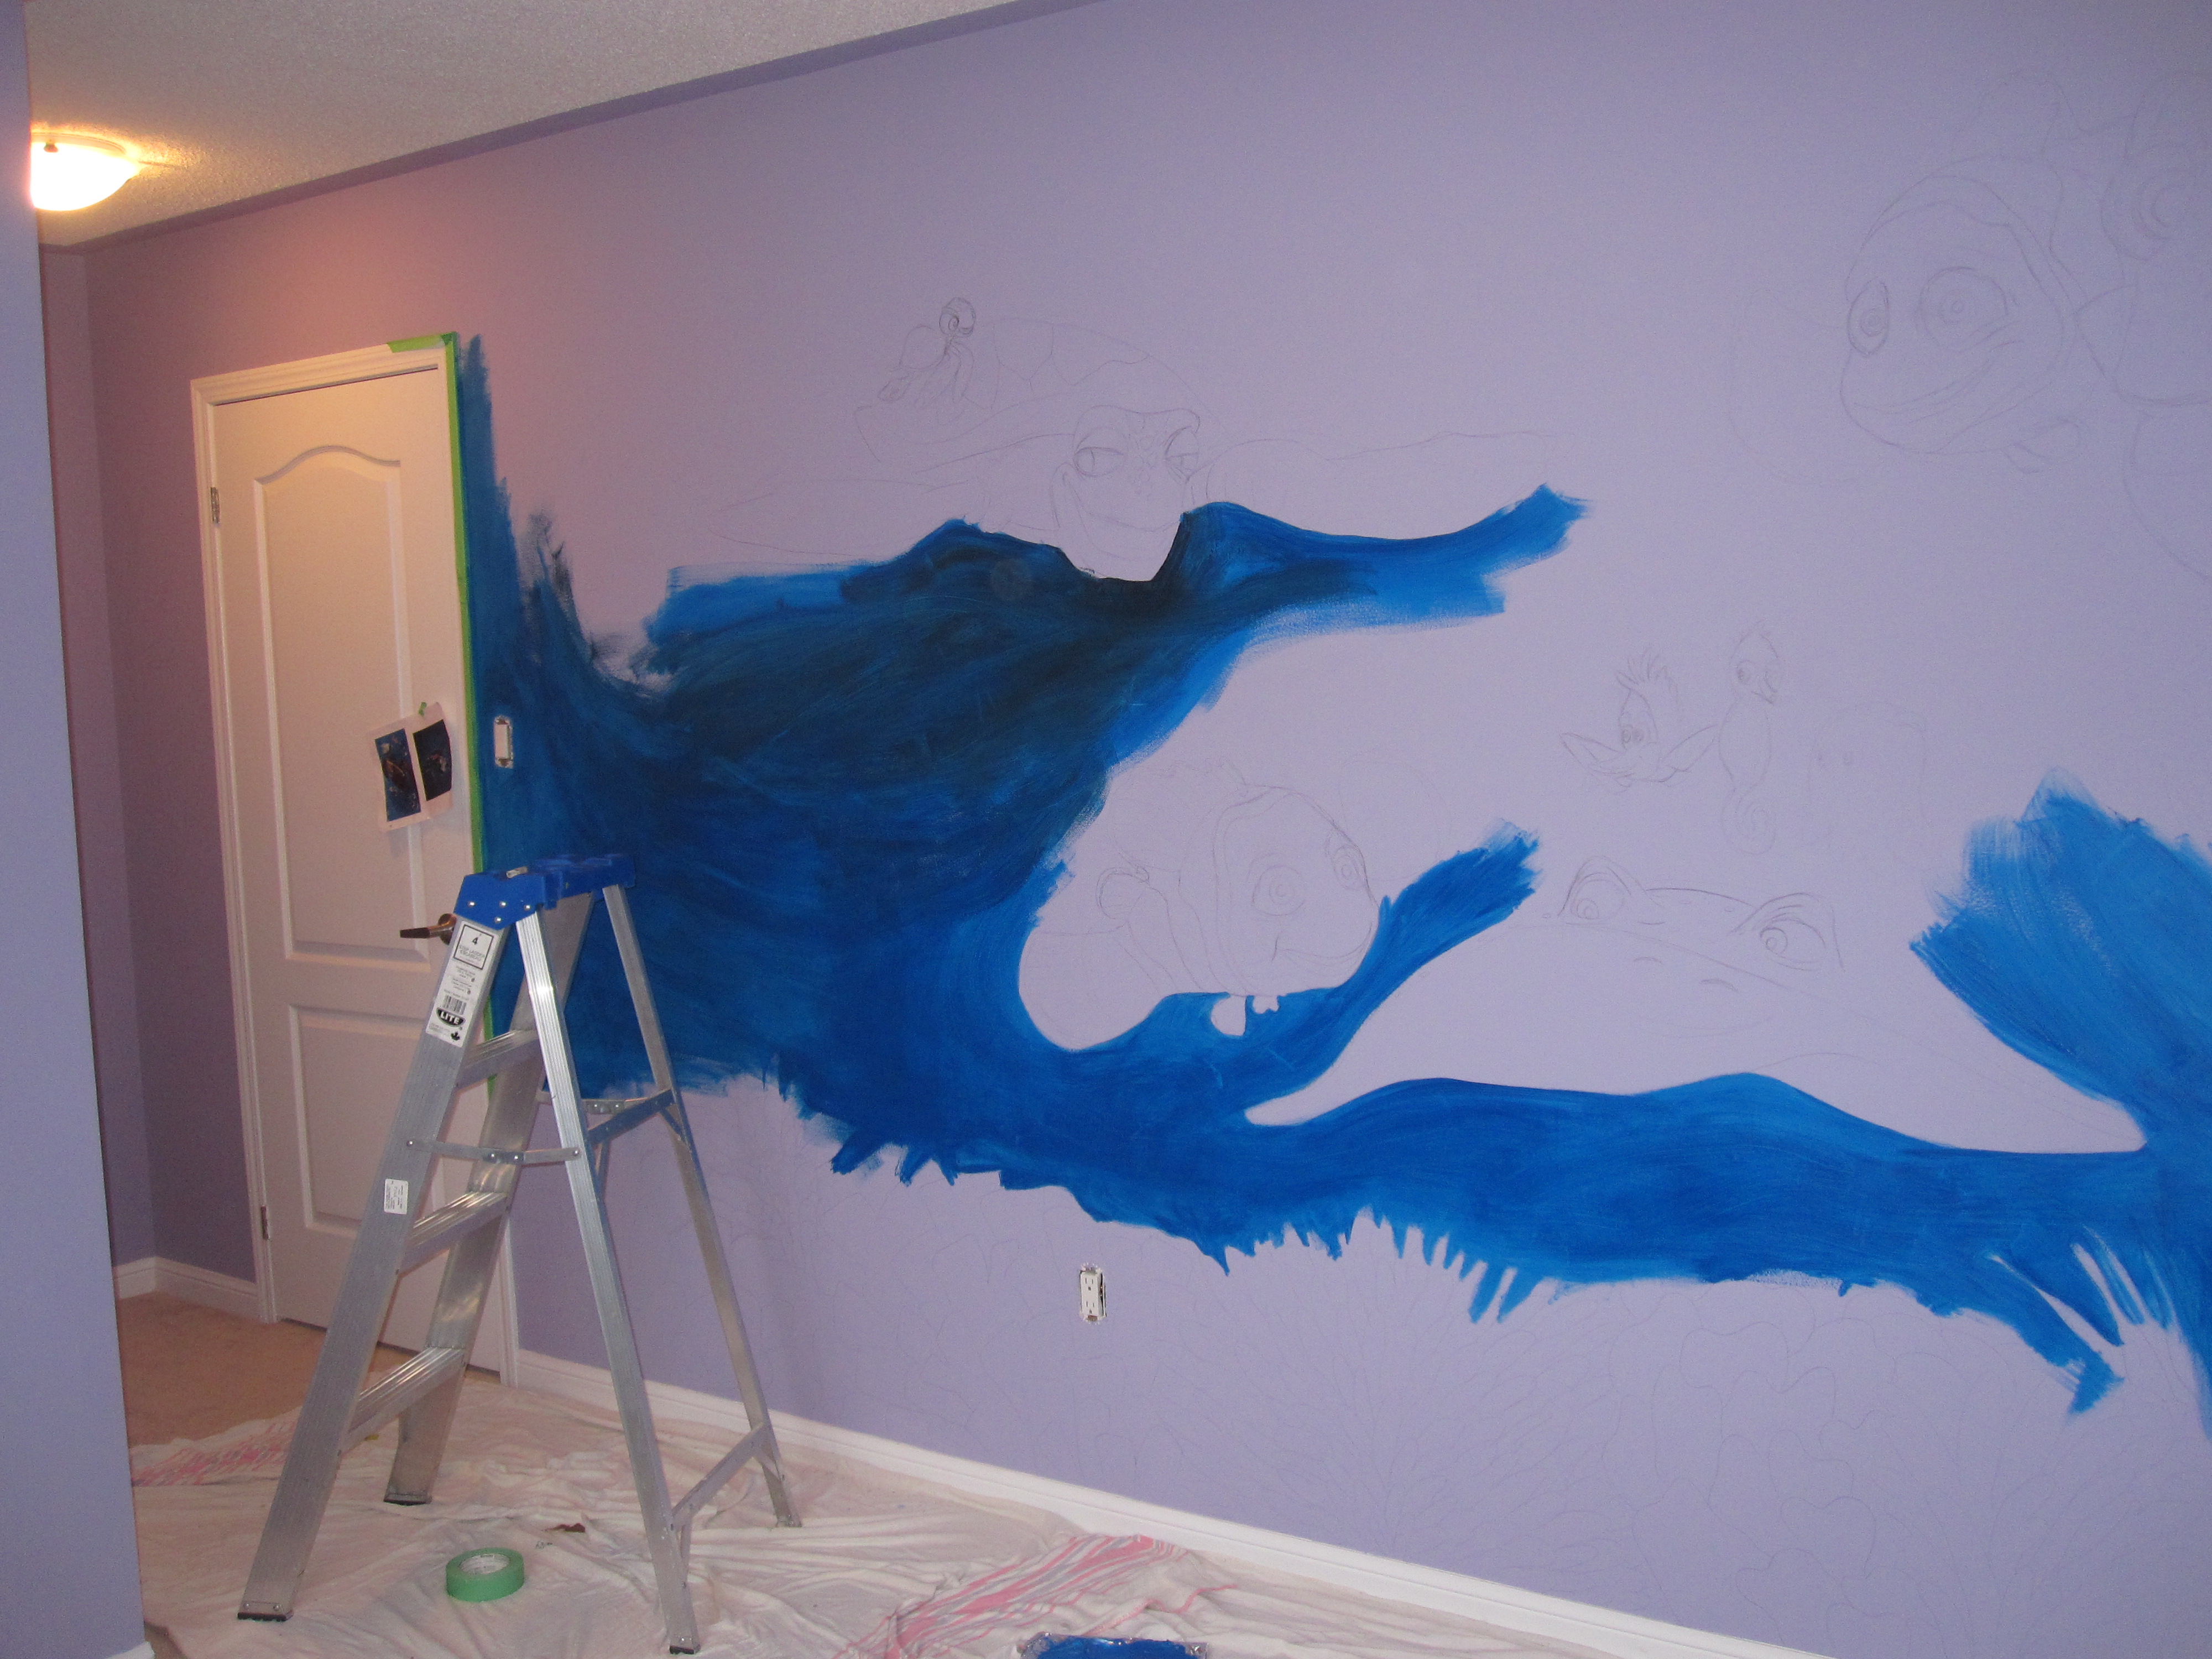
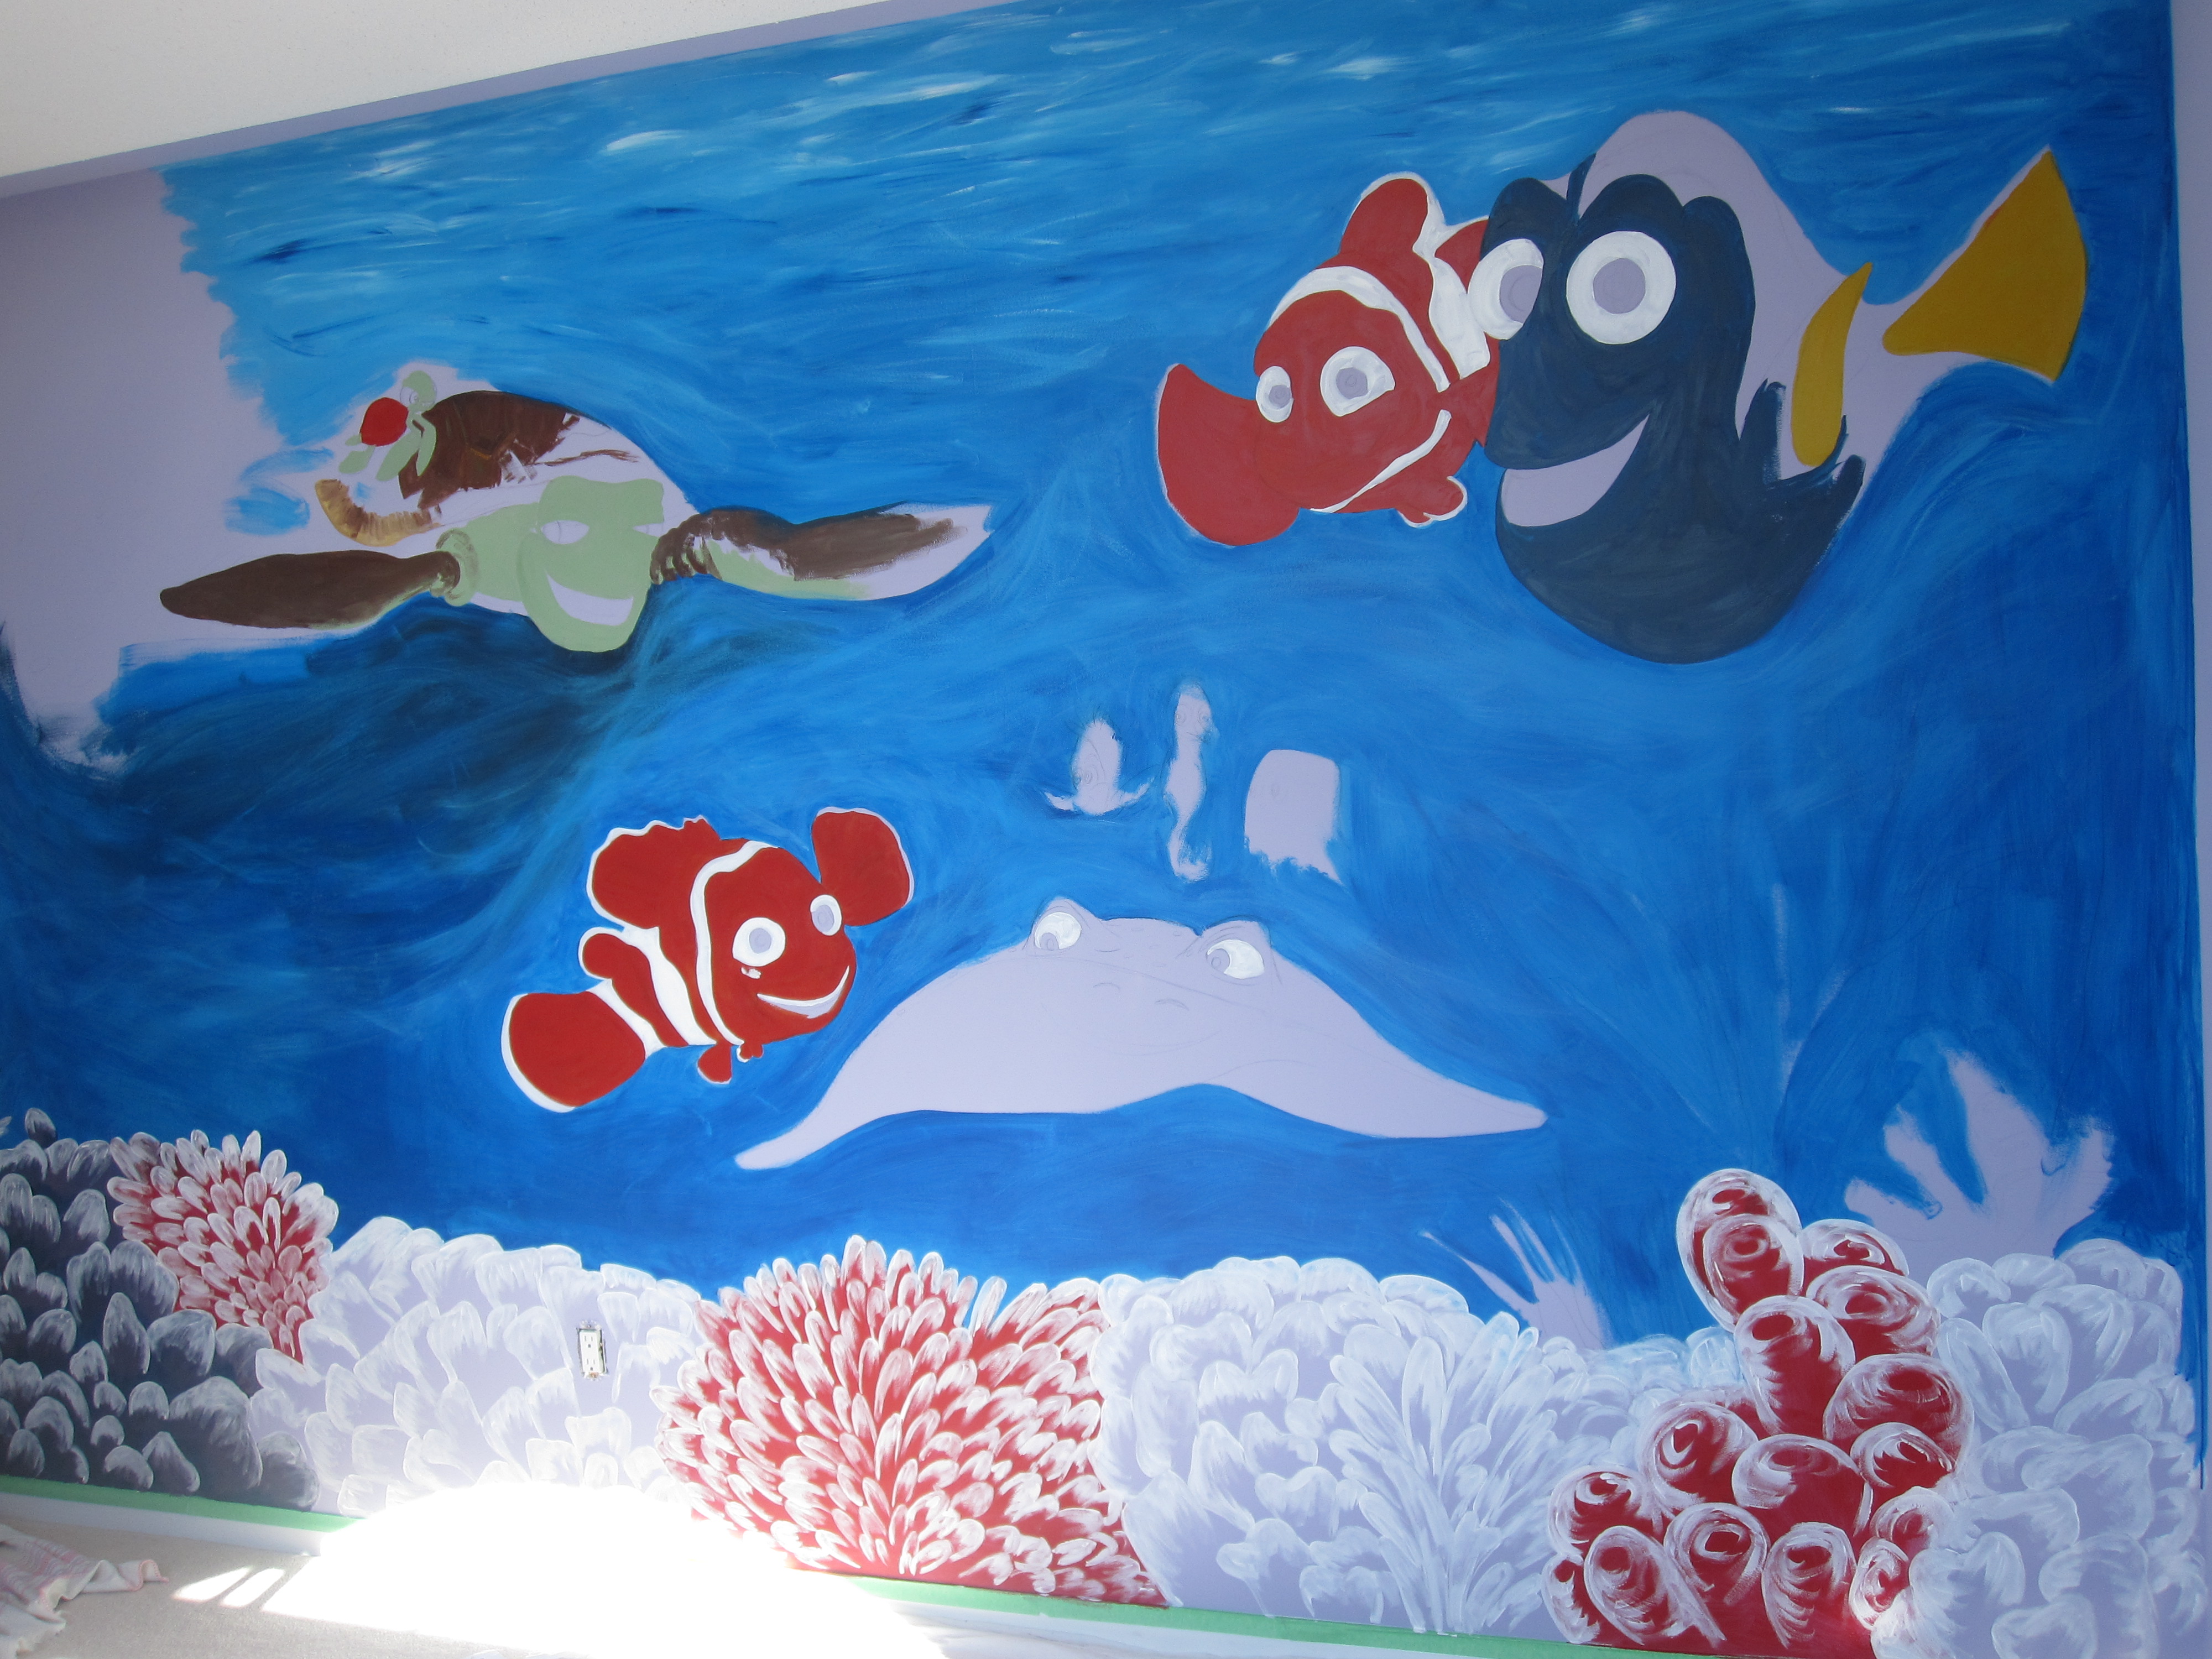
Step 4: Painting the Mural

It is time to paint!  I use acrylic (not oil) based paints which dry quickly and do not give off fumes.  I usually like to get the overall colours on first and leave the details until the end.

IMG_3846    IMG_3845IMG_3847    IMG_3849IMG_3851 


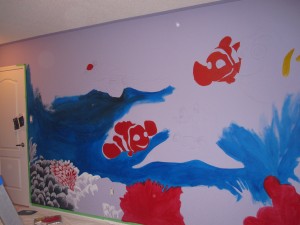
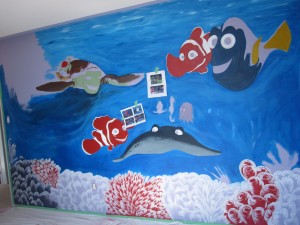
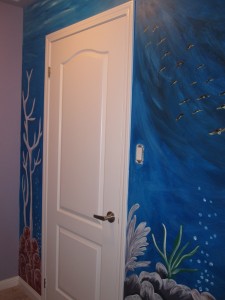
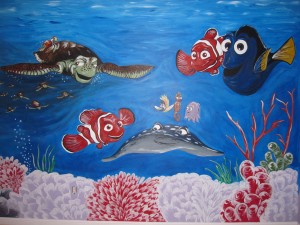
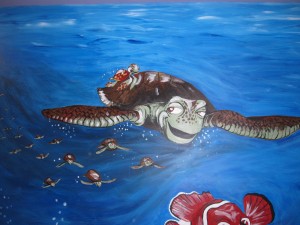
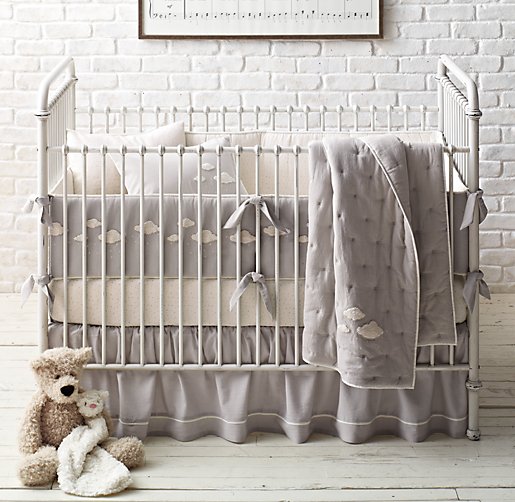
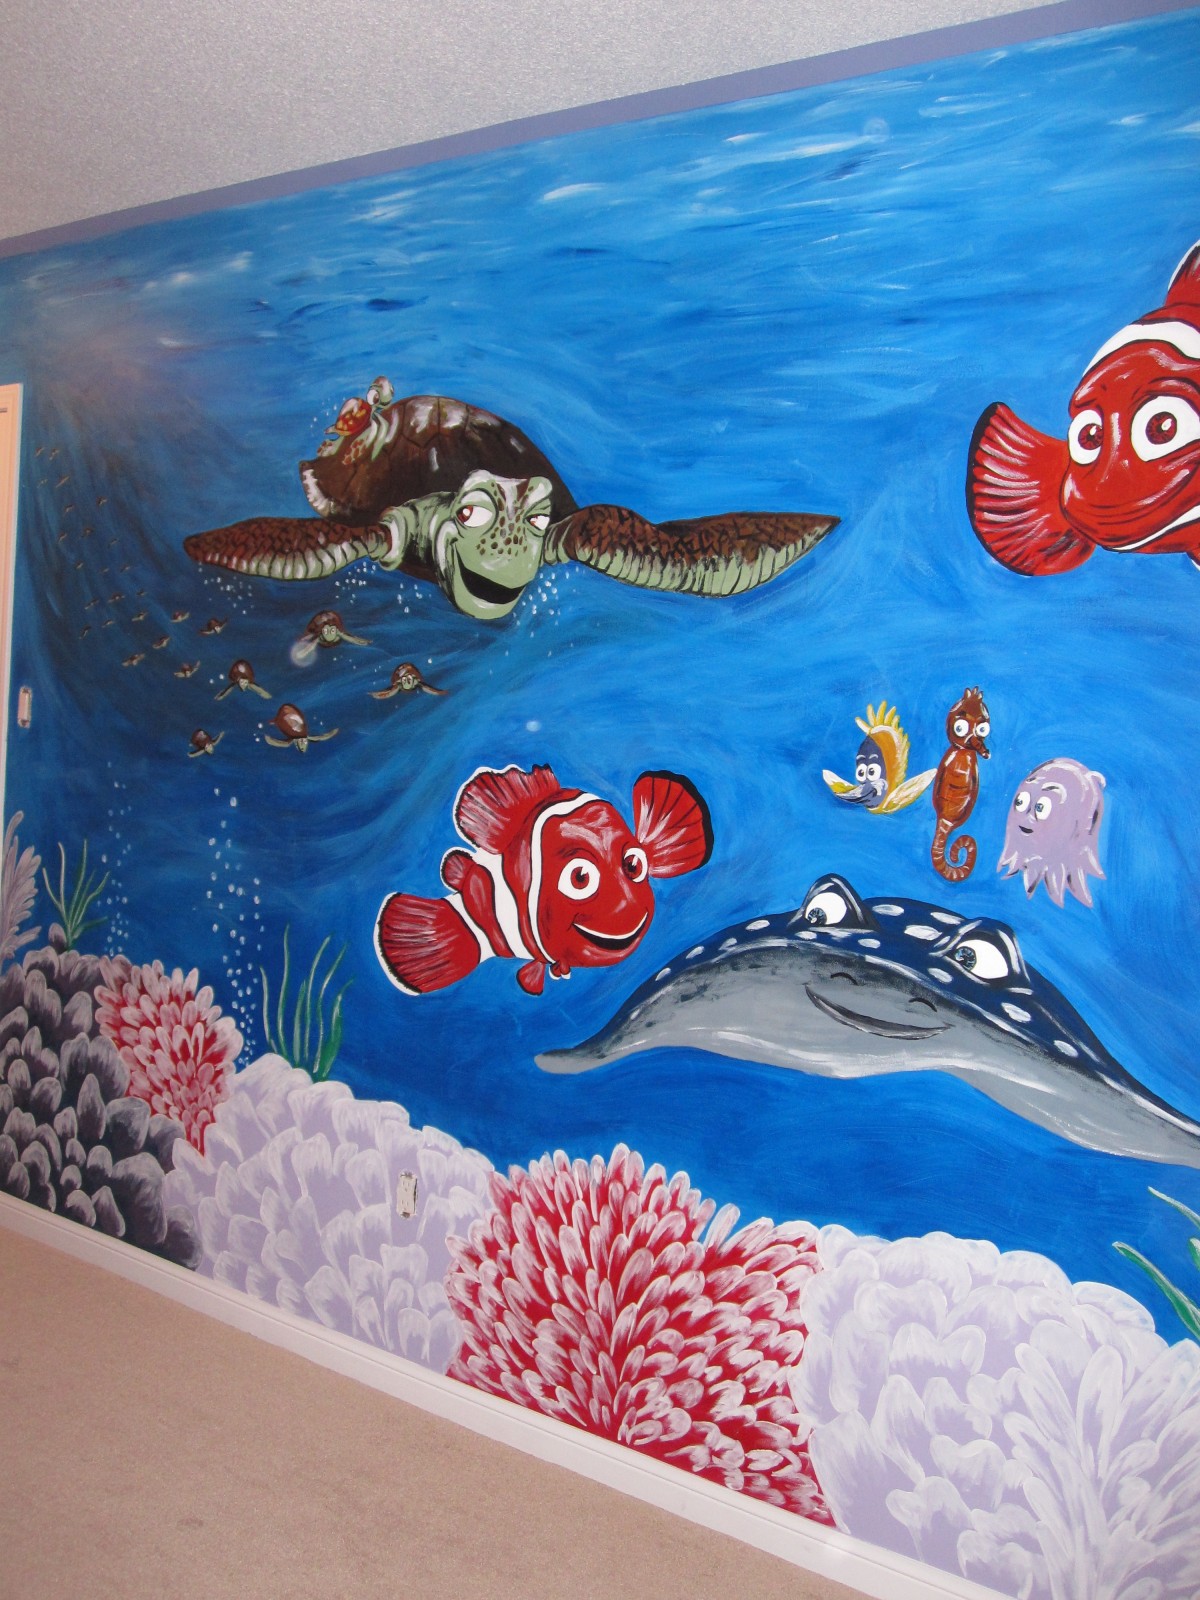
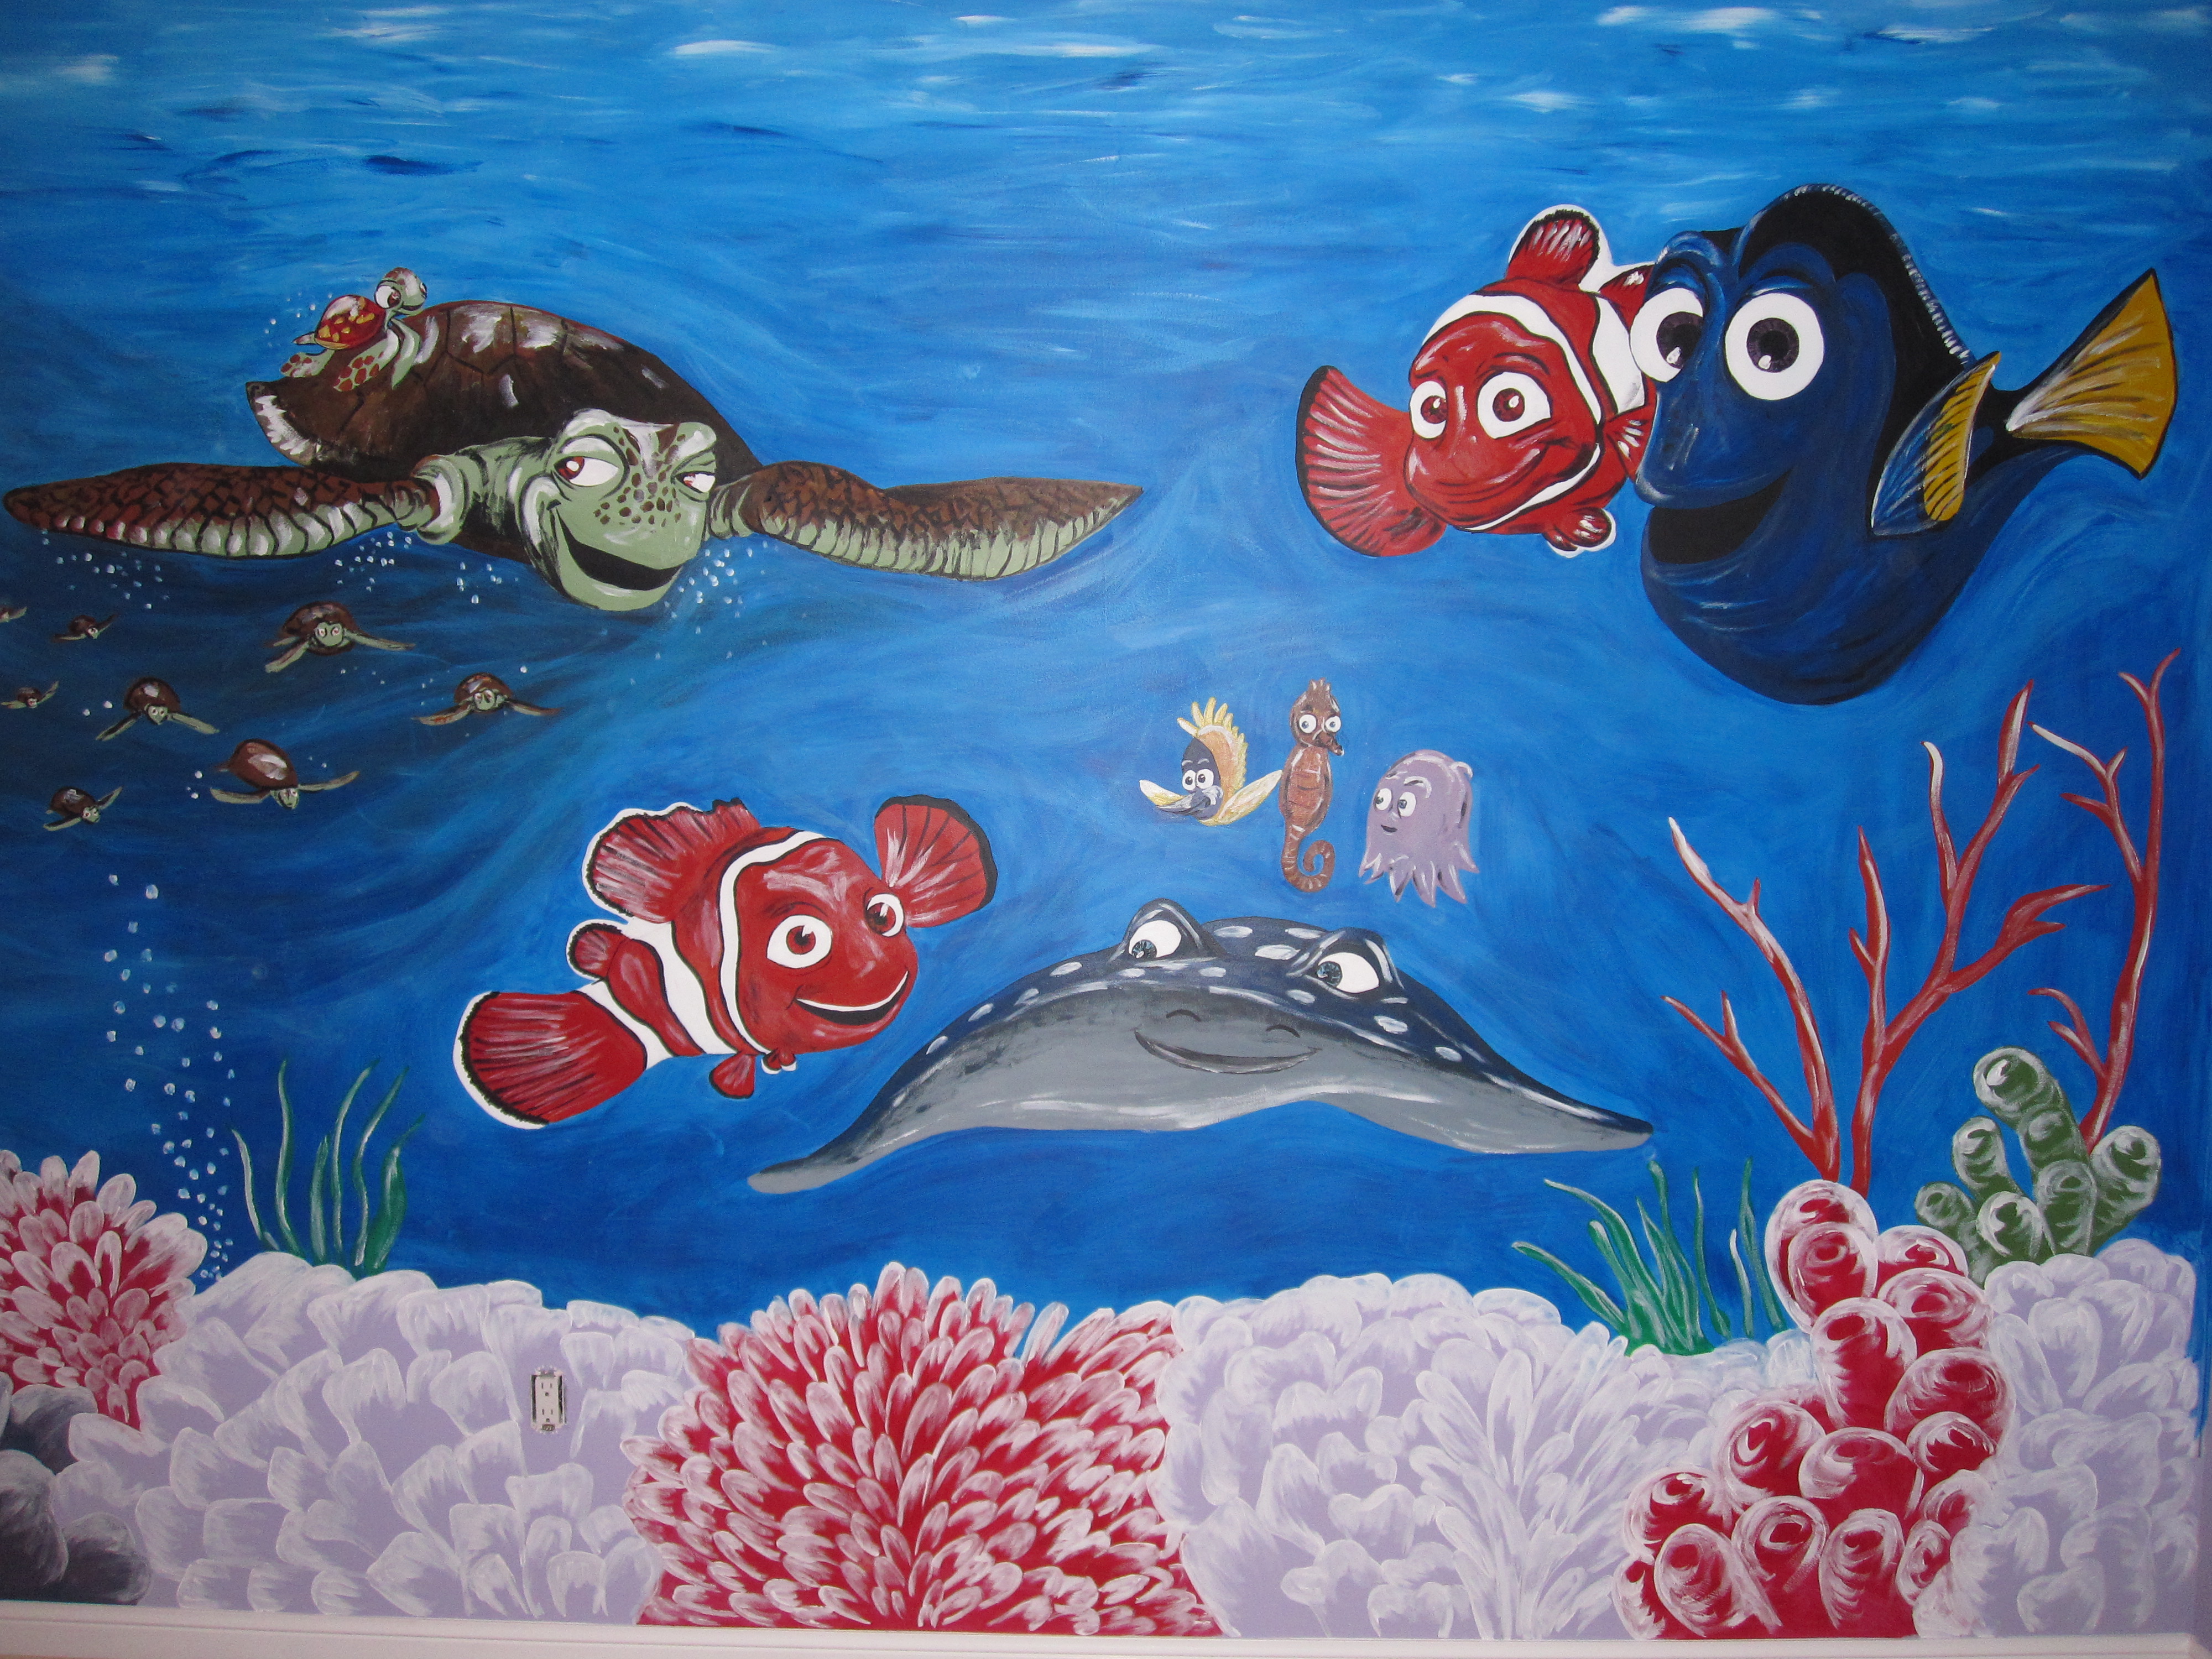
Step 5: The Finished Product

At the end I add the finishing touches including highlights and shadows.  Then… ta da!  The mural is done and ready for your little one to enjoy!

IMG_3861     IMG_3864IMG_3865     IMG_3867