Blog

My Struggle With Postpartum Self Esteem

For women there is a constant expectation and pressure to look a certain way. Whether it’s actresses in movies, the media picking apart celebrities, or airbrushing in your favourite magazines, we’re bombarded from every angle with how we “should” look.

Add to that the toxic, often repeated, phrase of “baby weight”, and the idea that new mothers have to “bounce back” or suffer comparisons to their “pre-baby body” and it’s no wonder a lot of women’s self esteem takes a hit once they’ve had a baby.

My Struggle With Postpartum Self Esteem by Roseanne Murray for Nesting Story
At 3 months postpartum I was constantly feeling self conscious about my body

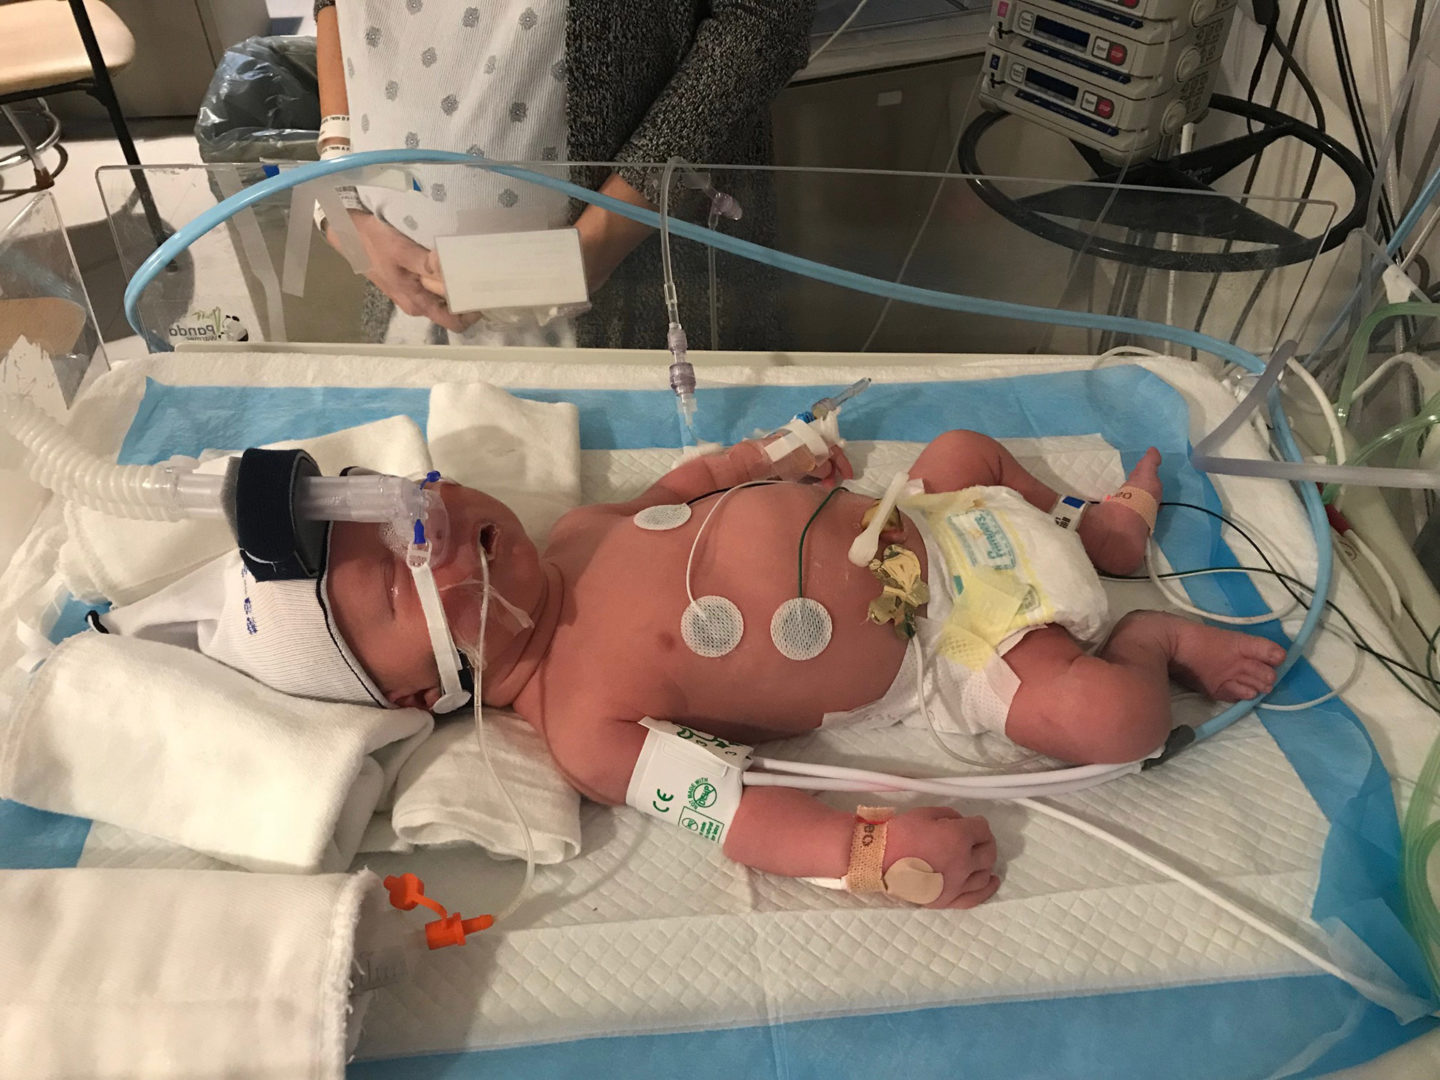
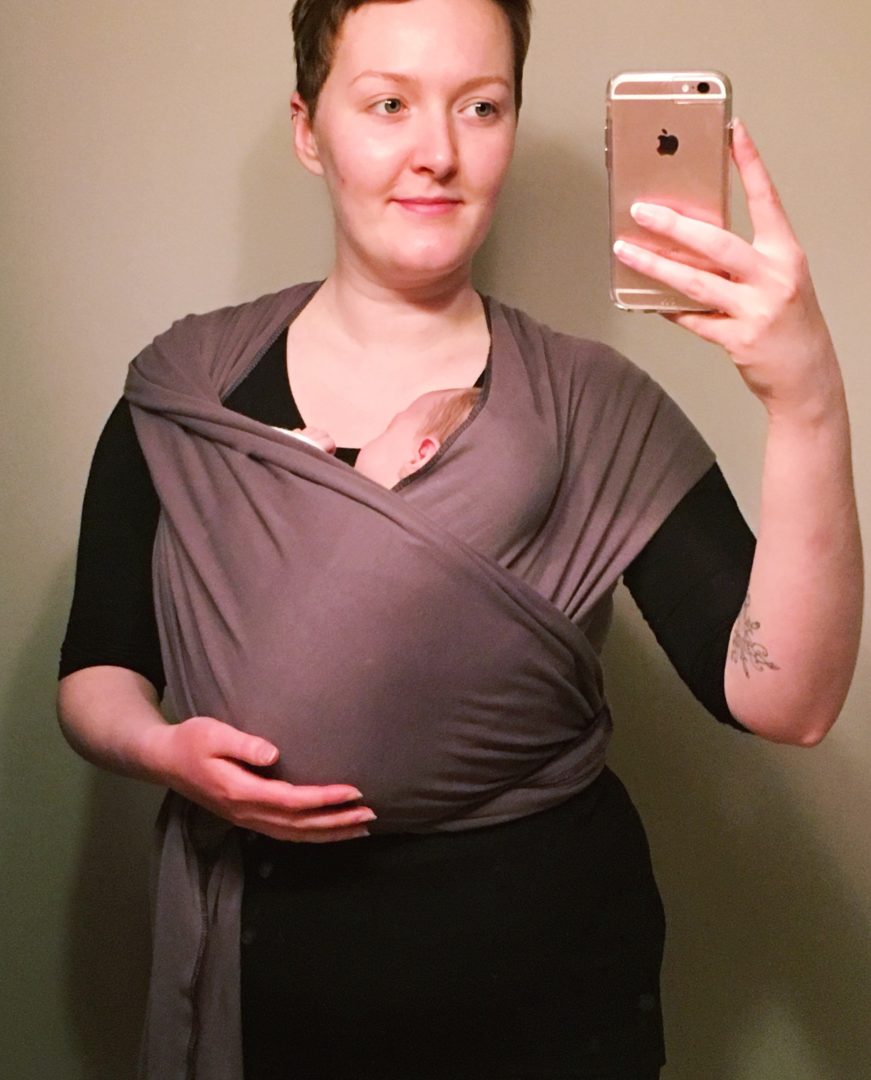
I fell into this trap freshly postpartum, and let’s be honest, these thoughts still linger. The intense physical changes your body goes through after pregnancy are difficult enough, never mind the overnight identify shift, and the sleep deprivation (oh, the sleep deprivation).

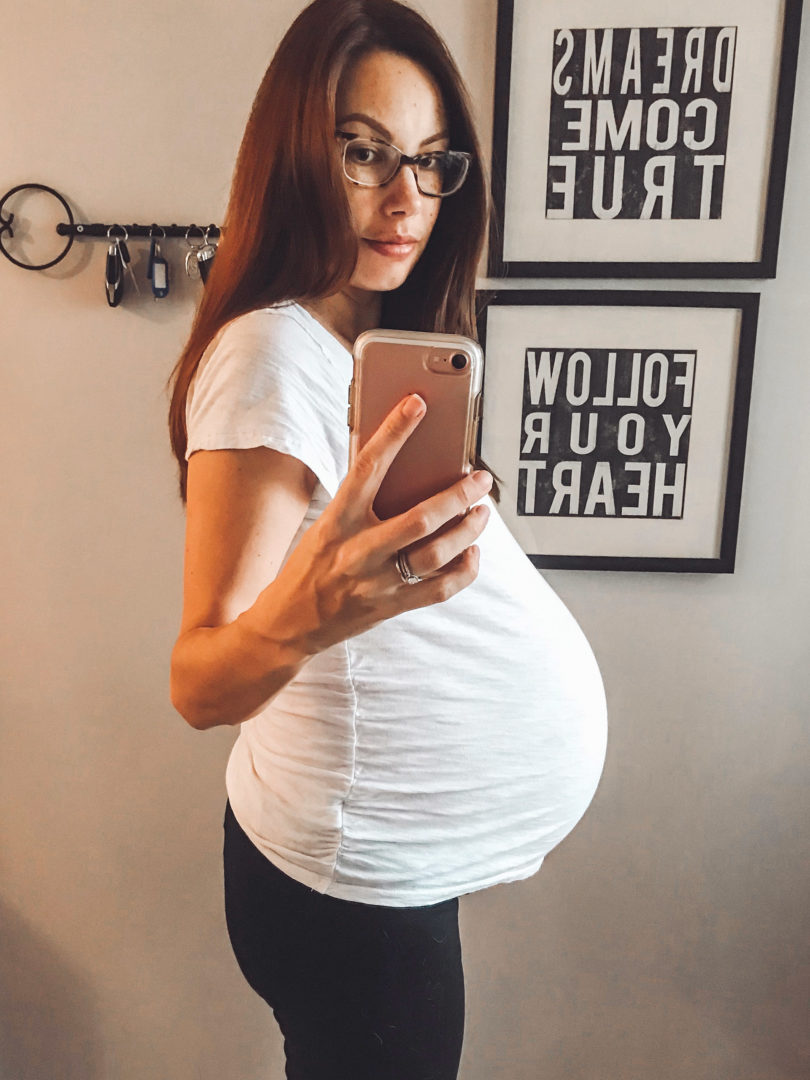
I kept saying “this isn’t my body” because it was so, SO, different from what I thought it would be after birth. As someone who has always preached self-love, regardless of the how your body looks, I was disappointed in myself to be struggling with my postpartum self esteem because I was heavier. Fitting into any clothes I owned was difficult, the sheer heaviness I felt in my body every time I moved was difficult. My body looked and felt completely alien to me.

A lovely photo of me using my Moby wrap with Willow. I could never bring myself to share this because I thought I looked so large.A lovely photo of me using my Moby wrap with Willow. I could never bring myself to share this because I thought I looked so large.
A lovely photo of me using my Moby wrap with Willow. I could never bring myself to share this because I thought I looked so large.

But what had I really expected? There is a serious lack of representation for how postpartum bodies will look and feel. I really had no idea what to expect.

I had heard my whole pregnancy how “breastfeeding will make the weight fall off!” But it didn’t work that way for me. I gained around 50lbs during my pregnancy, and two years later I’m still carrying about 20lbs of that. It took me a long time to learn to love myself again. I spent so much time feeling like my body had let me down because it didn’t look how it used to. Fighting these thoughts is something I’m working on.

To think of my strong postpartum body in these narrow terms is so damaging. It can be difficult to come to terms with how much changes after pregnancy and birth, and our society’s attitude to postpartum bodies definitely doesn’t help.

The first few months (or, let’s be honest, the first year) after having your baby is a steep learning curve. It’s a scary, beautiful ride navigating this new phase of life. The last thing you need is to feel ashamed of how your body looks, or feel anxious about how you’ll “lose the baby weight”.

Whenever you find your thoughts drifting to your pre-pregnancy skinny jeans gathering dust in your wardrobe, or that new exercise regime you saw to get rid of “the mum pooch”, please  remember how incredible your body is, and remind yourself of these facts first:

You literally grew a human being(s) inside of you.

Isn’t it mad when you think about it? You LITERALLY grew a human being, with no conscious effort; you created life while you slept. It’s a pretty awesome achievement, and definitely one to feel proud of. If you breastfed, you also produced breastmilk all while batting through the sleep deprivation and craziness of newborn life.
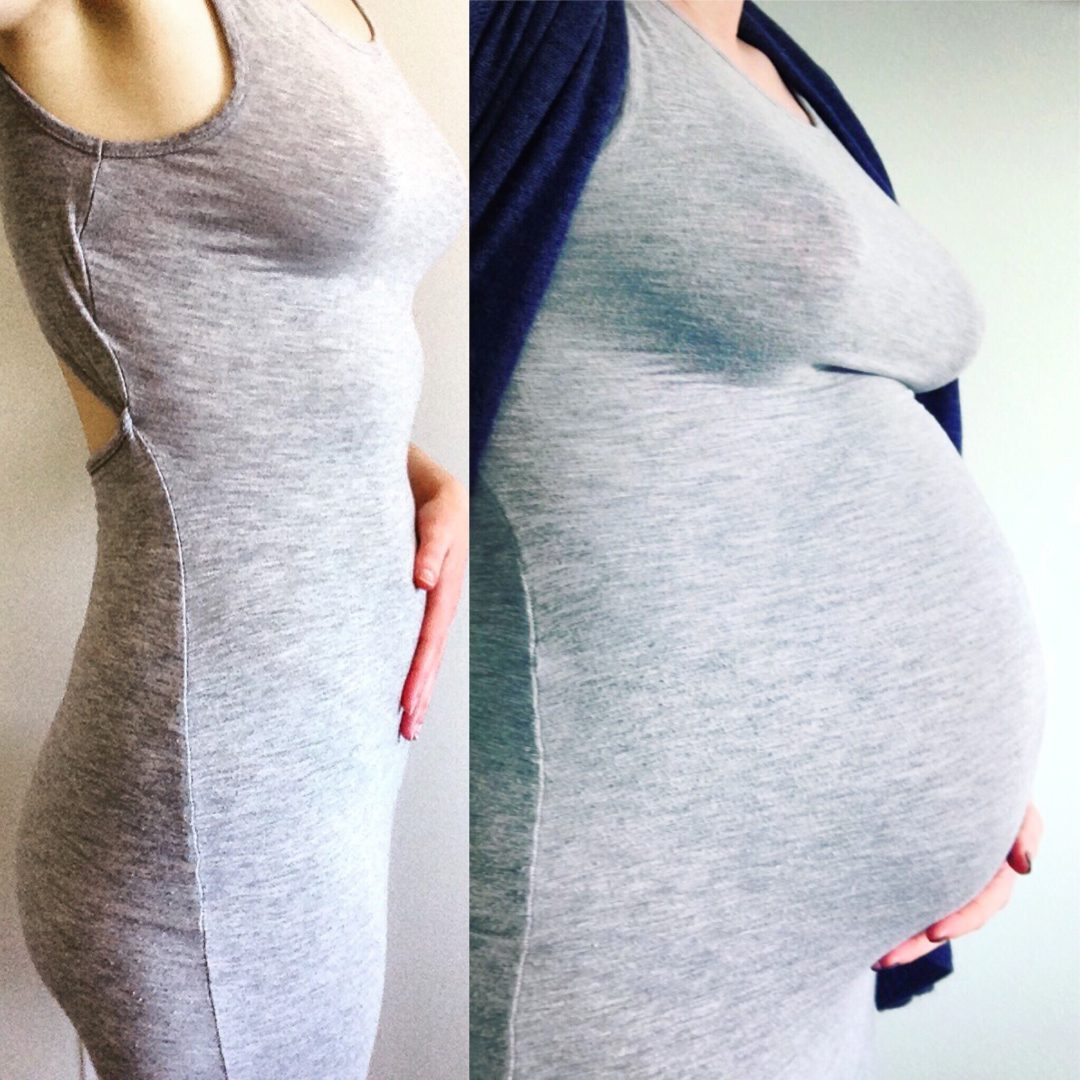
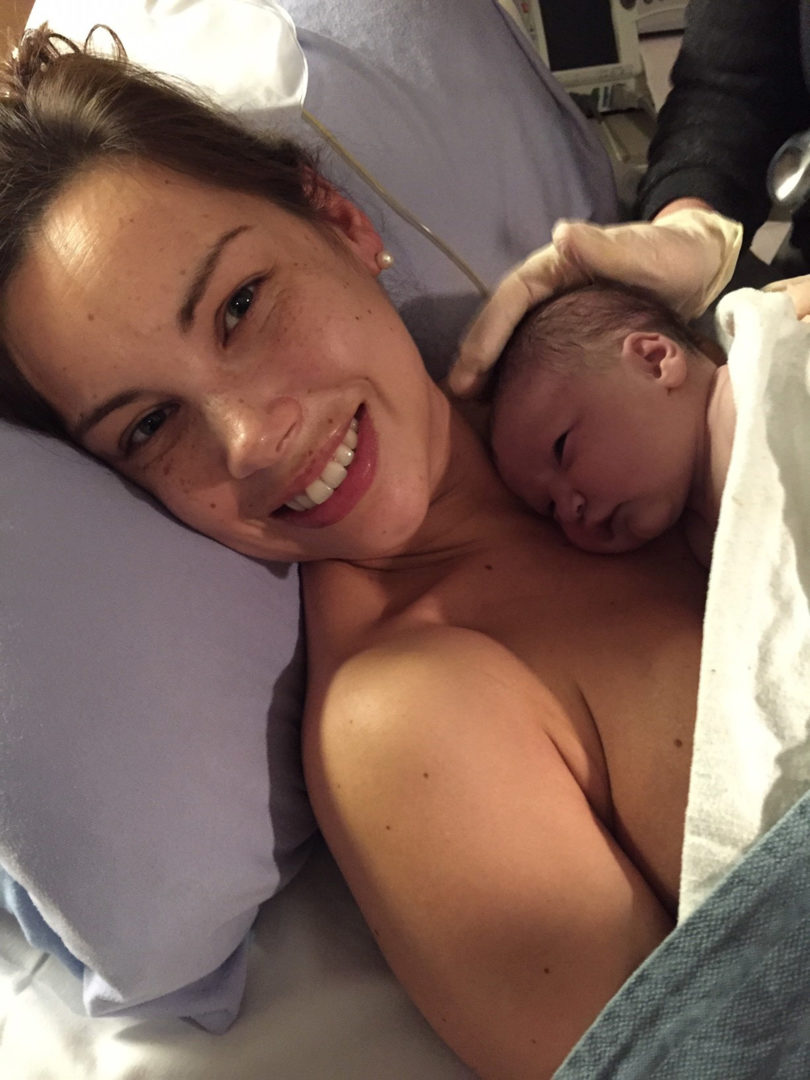
Baby Bump comparison, 15 weeks pregnant and 40 weeks pregnant.
15 weeks pregnant, compared to 40 weeks pregnant.

You gave birth.

It took sheer strength and determination for you to birth your child (not to mention surviving labour and contractions and all that crazy business). Whether you pushed with everything you have, or you underwent surgery to have your baby brought into this world, your body is insanely powerful.

Hours old newborn baby.
Willow, only hours old.

Your body records your life.

Whether you’re left with stretch marks, loose skin, or any leftover signs of pregnancy, think of them as beautiful natural tattoos! They serve as a physical reminder of the strength you possess, and the beautiful experience of pregnancy you were so lucky to experience. And stretch marks are actually extremely beautiful and delicate, if you look at them without judgement and hate.

My Struggle With Postpartum Self Esteem by Roseanne Murray for Nesting Story
Newborn life is a beautiful struggle, take it slowly and treat yourself with kindness.

Your body is absolutely incredible, and deserves to be honoured, treated with kindness, and loved fiercely as you embark on this new phase of your life. Wanting to gain back your previous level of fitness and feeling strong is fantastic, but coming at it from a place of hate for your soft postpartum body will never make you feel good.  

Your body is so much more than how it looks, please remember this, and treat yourself with love if you’re struggling with your postpartum self esteem today. You’re beautiful, and you got this mama.

Roseanne is the blogger behind the honest and inspirational personal blog Roseanne Writes. Native to Scotland and now calling Canada home, Rosanne helps mothers navigate motherhood while remaining true to themselves. You learn more about Roseanne and follow her personal blog here.

Baby Products You Can Use in Your Beauty Routine

How many times have you gone to wash your face at night or reached for your dry shampoo only to find out that they’re empty?

We are often so busy focused on everything else that we forget to keep our personal supplies stocked. The things we always make sure to never run out of, though, are baby products. It only takes one diaper change with an empty diaper wipe container to make sure things like that never happen!

So, since your baby supply is probably the equivalent of a fully stocked Costco, here are 5 baby products you can use in your beauty routine!

Baby Products you can use in your beauty routine - Elyse Morency for Nesting Story

Baby Wipes

When you’ve run out of makeup remover, baby wipes are a great replacement. They’re great at removing any makeup, dirty, and oils sitting on the skin. This is something that I keep in my makeup kit while working on clients because it does such a great job of cleaning the skin!

Baby Wash

Baby wash is one of those secret weapons that can be extremely useful in your beauty routine. It is designed to be gentle on the skin and makes a great face wash! Most baby washes are fragrance free, hypoallergenic, and have a moisturizing formula which ensures a great cleanse without stripping your skin of all the good oils.

Another great use for baby wash is cleaning your brushes. It cuts through makeup grime and maintains the quality of the bristles.

Baby wash is great for your face too -  Elyse Morency for Nesting Story

Body Lotion

If you’ve run out of face moisturizer, using a baby body lotion is a great alternative. Any scent free baby lotion works amazing since it won’t clog pores and is typically a light consistency. My favourite body lotions to use on my face when I’m in a pinch are Glaxal Base and Cerave. Both have done wonders for keeping my skin hydrated and clear.

 baby products you can use in your beauty routine - Elyse Morency for Nesting Story

Baby Powder

There is nothing worse than waking up in the morning and realizing you don’t have time to wash your hair. Grab some baby powder and sprinkle it on your roots and work it in to absorb the oils. It’ll take away the oily look and add a fresh scent to your scalp!

Diaper Cream

Diaper cream works really well as a spot treatment for dry skin. Before you go to bed, apply your moisturizer to a clean face, and then top the dry spots with diaper cream. In the morning when you wake up, remove the cream and your should find the dry patches have cleared up. Diaper cream does a great job of locking in moisture and creating a barrier so the skin can heal, perfect for any irritations you might have!

Unexpected beauty products mom's can use - Elyse Morency for Nesting Story

If you want to learn more quick makeup tips that you can add to your everyday makeup routine, check out www.elysemorency.com. You can also find Elyse on Instagram at www.instagram.com/elysemor/ where she talks about the real and raw life of motherhood and makeup!

Top 3 Tips for Travel with a Picky Sleeper

Traveling with a picky sleeper - Erica Parachini for Nesting Story

For the first time since my son was 4 months old and in the throes of colic, we decided to take a family vacation to Montana. To give you a bit of a backstory my son has suffered from sleep issues from the minute he took his first breath. He refused to sleep unless it was on my chest and napped in my arms for the first year. Once he hit 13 months a miracle happened and he started sleeping 3 hours during the day and 12 hours at night! He is now 15 months old and is in the most perfect routine for sleep BUT he is very picky about his sleeping situation. If he was such an amazing sleeper at home why couldn’t we take him on vacation?

In order for us to survive the nights and not completely start fresh on a new routine once our trip commenced, we were determined to keep sleep as normal as we possibly could for him. Here are my tips for surviving travel with a picky sleeper!

1. Recreate the Sleeping Environment.

The garbage bag trick

Use Blackout Shades. My son sleeps in total darkness. I’m talking you cannot see your hand in front of your face darkness. Your standard “Blackout shades” don’t cut it seeing that we had to cut any source of glimmer out of his room in order for him to not be distracted by it. The Trash Bag Trick works wonders! I found that using 50-gallon black trash bags doubled up blocked out 100% of the incoming light of the room that I was attempting to blackout. I used double sided removable stickers to line the outline of the window and was able to secure the garbage bags without any gaps between the window. These are removable pads as well which make removal a breeze!

Make your own Suction Cup Blackout Shades to help your picky sleeper

Make your own Suction Cup Blackout Shades. I found these on Amazon and they have been a staple in our sleeping routine since I discovered the need for total darkness sleep! They have Velcro around the sides so they can be customized to fit your window and suction cup to the edges to seal the light out completely.

Use blackout shades

Invest in a Travel Mattress. Let’s face it, Pack n’ Plays pads are not crib mattresses, and a picky sleeper knows the difference! We ordered a mattress the size of the play yard and a fitted sheet. Both fold for travel and this extra effort gave our son the added comfort of home in an unfamiliar environment.

Pack It All. We brought our sound machine, video monitor, sleep sack, lovey and everything necessary for his bedtime routine. For us this includes a bath, reading time in dim light and then in bed to sooth himself to sleep.

2. Determine the Prime Sleeping Location:

Just because you’re sharing a hotel room doesn’t mean you have to share sleeping spaces! There are many options for sleeping locations if you dare to get creative! For us, it ended up being a guest bathroom with a small window. The window was easy to blackout and the pack n play that he slept in was near an outlet for the monitor and sound machine to be close by. You can set up a bedroom in a hotel bathroom, a large walk in closet or if needed you can set it up in the corner of a mutual room. I like separating my child’s sleeping environment from ours so that we can comfortably stay up after bedtime and relax without fear of waking our toddler.

3. Stick to Your Routine:

Stay on Schedule. As tempting as it may be to stay out exploring or spend extra time visiting, sticking to your schedule is vital. A late night here and there or a missed nap once or twice isn’t enough to ruin your baby’s routine forever but if you spend your trip off routine it’s going to be a lot harder to regain your schedule once you return.

Traveling with a picky sleeper - Erica Parachini for Nesting Story

Don’t Skip Naptime. If you baby sleeps well in the car try to do your car travel during prime nap times after wearing them out. If your baby doesn’t (like mine) plan to be at your temporary home during naptime to have the best chance of sticking to your schedule.

Traveling with a picky sleeper can be daunting but with these tips you’ll be able to keep your child on their schedule and keep your sanity when you return home! What’s your favourite travel tip for traveling with littles?

Erica Parachini is a writer and creator of Made At Home Mom Life, a supportive community empowering mothers to feel more at home in their motherhood. You can also check out more from Erica and “Baby H” on Instagram.

Can you ever prepare for a Twin birth?

Okay, so where we left off I was lamenting about the surprise news that I was expecting twins. I freaked out, panicked and then finally came around to the idea, (not that I had a choice in the matter ). So as much as the pregnancy was a lot to mentally process and physically handle, the birth was a whole new ballgame. While pregnant I read as many books as possible, scoured the internet for twin birth stories (thank you Nesting Story for sharing yours) and talked to several twin moms. What I came to realize is that everyone had different experiences, but a common thread was that multiples usually came before 38 weeks, a twin birth likely takes place in the operating room, with a team of people are present at the birth, and that I should expect the babies to spend some time in the nursery and potentially the NICU. This was a lot to process considering I had my first child two years prior in what I like to think of as a peaceful setting, still in the hospital, but with only my midwives present as the sun came up in the early morning hours.

First moments of skin to skin with my first born

Due to low water levels in one of the baby’s sac’s I was told that I would be induced at 36 weeks. The boys were measuring well, they were both head down and there seemed to be no other complications. I was extremely happy to have been given a date as I was physically tapped out. I was scheduled to be induced on a Sunday in January and thankfully we had arranged family members to come stay with our daughter. I also was very lucky as I was able to be followed by midwives, one of whom had been a part of my first pregnancy, and a doctor to do the actual delivery. So the idea of having a date and a plan gave me some relief.   

Can you ever prepare for a twin birth? - Fallon Melander for Nesting Story
35 weeks pregnant with the twins and ready to pop

That morning we went into the hospital very anxious and excited. I was planning on a vaginal delivery with both twins as they were in the perfect position. However, I knew that there was a chance that I would need a C-section if any complications arose. Luckily I had the full support of my midwives and doctor to try this route for a twin birth instead of just scheduling a C-section. After settling in I was hooked up to the monitors we were told that they were going to begin the inducement by administering oxytocin. Needless to say I was ready to evict these twins out of my broken body. About an hour later I was informed that the one anestheologist on duty was in a surgery and would not be able to give me an epidural until he was finished, which happened to take a couple hours.

Things progressed very slowly all day. I was only receiving a small amount of oxytocin as the delivery doctor and the anestheologist were both called into another emergency surgery. Being bed bound I began to get bored and frustrated. I could hear women in the rooms next to me bringing new life into the world, I was on my second shift of nurses, and the Women’s network movies were beginning to repeat themselves. After 12 hours of being bed bound I was just plain pissed. In my fit of anger I began to feel some discomfort down below – burning pain that I thought maybe was my catheter. After a few nurses came and left my husband turned to me and said are you ok? I started to say yes while spontaneously crying from searing pain. He ran to get the nurses and I struggled to keep myself from breaking the guard rail off of the bed.

I was rushed to the operating room and transferred to the cold table while also feeling every inch of pain – which is when I realized that the epidural was not working from my hips down. When everyone was in place, about 13 of us in total, I was told to push and after a few pushes Baby A was out and whisked away immediately to the warming table and a team of nurses to be inspected. I was worried about Baby A, but I also remembered that I had to still give birth to another baby. At this point all I could think was “I have to do that all over again!” This is when I really cursed the fact that the epidural was not working.

The next thing I knew an ultrasound machine was on my stomach to locate Baby B. Turns out he had flipped sideways when his brother left the womb and was no longer head down. Of course I did not know this at the time and with my mind still on Baby A and preparing myself for another birth. It felt like mere seconds had passed when the doctor told me to push gently (is there such a thing?) and the next thing I knew Baby B was out and also whisked away to the adjacent warmer. At this point I looked over to my husband who looked in shock and the doctor who still had not said a word but was covered in blood. My husband then told me that Baby B had come out feet first and our ever stoic doctor looked like he had been in a scene of the Walking Dead.

This is when I started to panic about the health of both babies, especially Baby B who had made his appearance into the world at 9:31pm, 9 minutes after his brother in an unforgettable way. Thankfully my midwives were there are kept us informed and told us that both babies were having difficulty breathing and needed to be taken to the NICU. All of a sudden we heard a long deep beeping noise and I looked at my husband wild eyed. It sounded like the unthinkable but my midwife ran over to me and told me that it was just the battery on one of the warmers that had been unplugged that was making the noise.

The boys were rushed out to the NICU and a very nice Resident doctor wearing a clear face shield (straight out of a SWAT movie) did the rest of the delivery – the placenta. I don’t know if she put it on as a precaution after she saw the doctor pull Baby B out and the aftermath that covered the doctor, or if that is standard practice. The whole time however my mind was on the babies and I had no idea what was happening to them. It was quite a whirlwind and once I was back in the delivery room my husband went with the nurse to see the babies. Meanwhile we had been getting updates from my midwife and she told us that they were stable but needed help breathing. I was being monitored and after I was cleared a few hours later I was able to go see the babies, who were still known as Baby A and B at this point.

Baby A was a vaginal twin birth
Baby A

Both babies were hooked up to the CPAP machine and other than difficulty breathing everything else seemed to be okay. One of the biggest surprises to me was how big they were, measuring at 6.4lbs and 6.1lbs. I couldn’t believe that I had been carrying over 12lbs of baby! To be honest at this point I was utterly exhausted and still was not processing everything that had happened – a faulty epidural, a breach baby birth, two babies on respiratory support, and a twin birth that did not require stitches! My midwife told me that I was a freaking unicorn, but I felt like I was in a foggy dream.

Baby B was a breach baby birth
Baby B

We still had a journey to overcome in the following days of our NICU stay and bringing home the twins but I think I will end the story here for now. Needless to say I am thankful that I have two healthy, strong twin toddlers who despite a rocky start are doing amazing.

Melander twins taking a sink bath at 1 year old

I hope this has helped some of you who may be expecting multiples to put your mind at ease and to know that there are some things you cannot control. I have talked to many twin moms about their pregnancy and birth journey and I have learned how unique each one is, and also how strong both babies and mothers truly are. This may seem like the ultimate test, but it’s the beginning of your story and what I hope is an amazing journey.

The Best Summer Strawberry and Cream Scones Recipe

The Best Summer Strawberry and Cream Scones Recipe - Lori for Nesting Story

There aren’t too many things better than a fresh, hot out of the oven scone. Sweet, savoury, buttered up….they’re pretty irresistible…amiright???  A family favourite in this house is strawberry and cream scones. The best part about them is they are not complicated to make, in fact they are quite simple and are quite impressive to others…just be sure not to let them know how easy they are to make.  Not only are they delicious to eat, they make such a beautiful hostess gift. My daughter Sophie and I are always looking for treats to bake and we always seem to come back to this simple scone recipe. I think she just likes to get her hands in the dough..so do I… it’s pretty therapeutic.  

Strawberry season is almost upon us (fingers crossed) and what better time to bake these treats.  The only thing that smells better than a fresh strawberry, is the smell of these scones in the oven… your house has never smelled so good.  Sophie and I whipped up a batch recently to deliver to grandma and grandpa and i snapped a few photos to share with you.

I used to shy away from recipes that required me to make my own homemade dough.  Flip the page to the next recipe please and thank you very much. The texture of the dough never seemed right, dry, crumbly…but finally, I learned that the crumbly texture is in fact the proper consistency. Seriously guys…Do it once and you will see how simple it is and the dough comes together so beautifully in the oven.

This recipe makes 8 triangular scones and you can easily double the recipe for a larger crowd if needed.  They warm up beautifully the following day and with a smear of butter… come on!

STRAWBERRY AND CREAM SCONES

2 cups of all purpose flour, sifted

1 tablespoon baking powder

3 tablespoons granulated sugar

1/2 teaspoon salt

6 tablespoons chilled butter, cut into 1/4 inch cubes (i prefer salted organic butter but you can choose)

12 small organic strawberries, hulled and diced

1 tablespoon lemon zest

GLAZE (optional)

1 1/2 cup icing sugar

2 tablespoons  half and half cream

1/2 teaspoon vanilla

squeeze of lemon

INSTRUCTIONS

1. Preheat the oven to 425 degrees

2. Line a baking sheet with parchment paper

3.Combine sifted flour, baking powder, sugar and salt.  Stir until combined

4. Add butter (pre-cut and chilled) and incorporate using a pastry cutter or hands

*this will look like crumbs but its ok!!!!….. keep going

5. Gently fold in the strawberries and lemon zest and stir just until incorporated in  

6. Add the half and half cream and gently mix until it forms a soft dough

7. Place the dough on a floured surface and press gently until it is about 1 1/2 to 2 inches thick

8. Cut into 8 triangles

9. Using a spatula or pie server,  lift each triangle and place on the cookie sheet

10. Bake for 15-18 minutes, or until lightly golden on top

Let the scones rest on a cooling rack for 15 minutes.

I put the cooling rack over the tray I used to bake the scones for an easy cleanup

While they are cooling, I prepare the glaze

GLAZE

1. Whisk the icing sugar, vanilla and half and half cream until blended together.  Give one or two squeezes of lemon into the mixture.

If the glaze is too thick you can add more cream or lemon juice…if its too thin..add a little more icing sugar

Drizzle the glaze over the scones, as much or as little as you prefer.  I don’t add too much glaze to mine because i like to put butter on mine…..its all about balance no?

These little gems are best served hot out of the oven.

They are scrumptious, flaky,  melt in your mouth perfection.

So simple to make for guests ..they will think you are the next Martha!

Serve them with ice cream, whip cream and a nice hot brewed cup of coffee…or with fruit and a mimosa!

Enjoy

Lori xo